

 US Dollar
What is fabric shrinkage? Essential guide for crafters
Posted by BLG on 2026 Apr 14th
Posted by BLG on 2026 Apr 14th


TL;DR:
- Fabric shrinkage occurs naturally due to fiber relaxation and varies by fiber type.
- Pre-washing fabrics before cutting helps prevent unexpected shrinkage and project distortion.
- Measuring shrinkage with test swatches allows for accurate yardage planning and better results.
You finish sewing a beautiful dress, wash it once, and suddenly it no longer fits. Sound familiar? Fabric shrinkage is one of the most common and costly surprises in home sewing and crafting. It can tighten seams, distort shapes, and turn hours of careful work into a frustrating do-over. The good news is that most shrinkage is predictable and preventable. Once you understand what causes it and how to measure it, you can plan smarter, cut more accurately, and finish projects that actually hold up after laundering.
| Point | Details |
|---|---|
| Natural fibers shrink more | Cotton, linen, and wool are most prone to noticeable shrinkage compared to synthetics. |
| Always pre-wash fabric | Washing fabric before cutting drastically reduces unwanted surprises in your finished project. |
| Test before you sew | Measuring a sample after a trial wash reveals actual shrinkage rates, protecting your investment. |
| Follow care instructions | Proper care is essential for minimizing shrinkage and preserving the look and fit of your projects. |
Fabric shrinkage means your fabric gets physically smaller, either shorter, narrower, or both, after it’s been washed or dried. It’s not a defect. It’s a natural response to moisture, heat, and mechanical action. As the reduction in length or width of textile material after washing and drying, shrinkage affects nearly every fiber type to some degree.
The reason it happens comes down to fiber structure. During manufacturing, threads are stretched and held under tension on looms. When that tension is released by water and heat, the fibers relax and pull back toward their natural state. Think of it like a stretched rubber band finally letting go.
Not all fabrics shrink equally. Here’s a quick comparison of common fiber types and their typical shrinkage rates:
| Fiber type | Typical shrinkage rate | Notes |
|---|---|---|
| Cotton | 3% to 10% | Higher with hot water and heat drying |
| Linen | 3% to 8% | Softens with washing, stabilizes over time |
| Wool | 5% to 15% | Prone to felting with agitation |
| Rayon | 5% to 10% | Very sensitive to moisture |
| Polyester | Less than 1% | Highly stable, rarely shrinks |
| Nylon | 1% to 3% | Minimal shrinkage under normal conditions |
| Blends | Varies | Depends on dominant fiber content |
A few key facts every crafter should keep in mind:
Understanding these basics is the foundation for every smarter sewing decision you’ll make going forward.
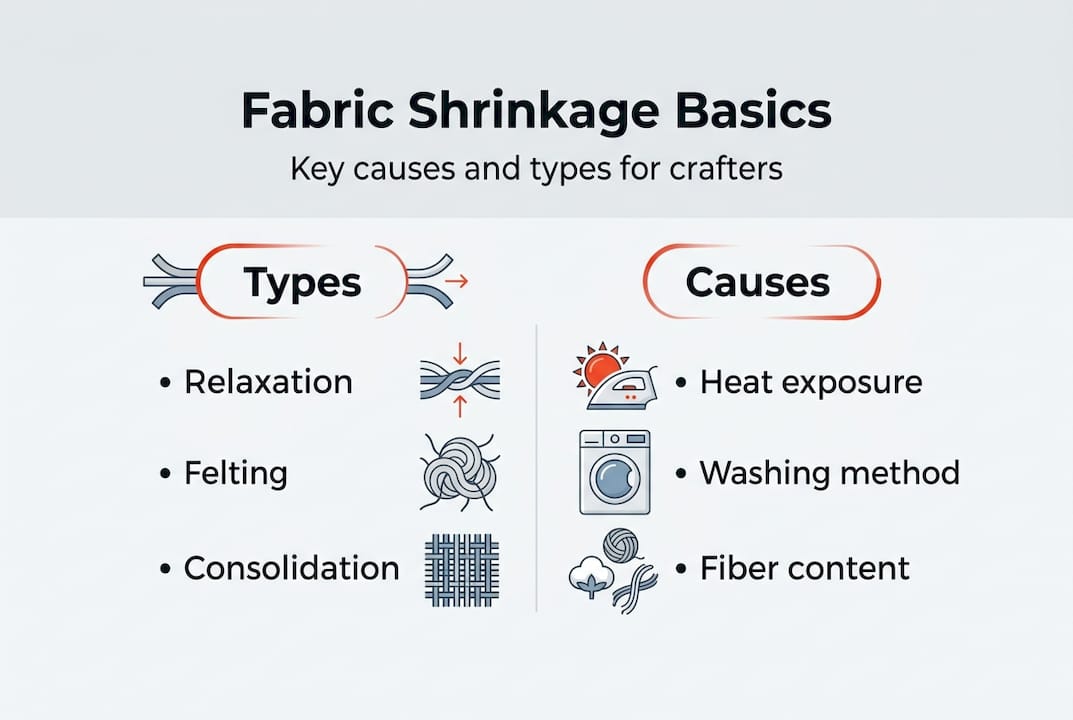
After understanding the basics of shrinkage, it’s vital to know the main types and what triggers them in your fabrics. Shrinkage typically falls into three categories: relaxation, felting, and consolidation. Each one behaves differently and requires a different prevention strategy.
Relaxation shrinkage is the most common type. It happens during the very first wash, when fibers that were stretched during weaving or knitting finally relax. Cotton shirts, linen tablecloths, and rayon blouses are classic examples. This type is largely a one-time event, which is why pre-washing before cutting is so effective.
Felting shrinkage is specific to wool and other animal-based fibers like cashmere and mohair. Repeated exposure to heat, moisture, and agitation causes the fiber scales to lock together, permanently matting the fabric. This is irreversible. A wool sweater washed in hot water can shrink by 20% or more and become stiff and dense.
Consolidation shrinkage happens gradually over time. Each wash cycle compresses the fiber structure slightly, and over many washes, the fabric becomes noticeably smaller and denser. This is especially relevant for quilts, upholstery, and any project that will be laundered regularly.
Here’s a side-by-side comparison to help you tell them apart:
| Shrinkage type | Trigger | Typical fiber | Reversible? |
|---|---|---|---|
| Relaxation | First wash | Cotton, linen, rayon | Partially |
| Felting | Heat and agitation | Wool, cashmere | No |
| Consolidation | Repeated washing | Most natural fibers | No |
The key causes behind all three types include:
Understanding the role of fabric care in your workflow helps you match the right washing method to each fabric type. A good fabric care checklist can save you from repeating the same costly mistakes.
Pro Tip: Cut a small swatch from your fabric before starting any project. Wash and dry it using the same method you plan to use for the finished item. This tells you exactly what to expect before you cut into your main yardage.
Understanding that shrinkage exists is only the first step. Here’s how you can actually measure and work around it before you lose a single inch of your carefully planned layout.
Simple at-home methods can reveal expected shrinkage percentages before you start sewing. The process takes less than an hour and can save you an entire project.
Here’s how to do a proper shrinkage test:
Common signs that shrinkage has already affected your project include:
When you’re buying fabric in bulk, always factor in your measured shrinkage rate. If you’re working with a fabric that shrinks 8%, you need to purchase at least 8% more yardage than your pattern calls for.
Pro Tip: Keep a small notebook or digital log of shrinkage test results for every fabric you buy. Over time, you’ll build a personal reference that makes future planning much faster and more accurate.
Once you can measure shrinkage, the next step is making sure it doesn’t undermine your work. Prevention is simpler than most crafters expect, and it starts well before you pick up your scissors.
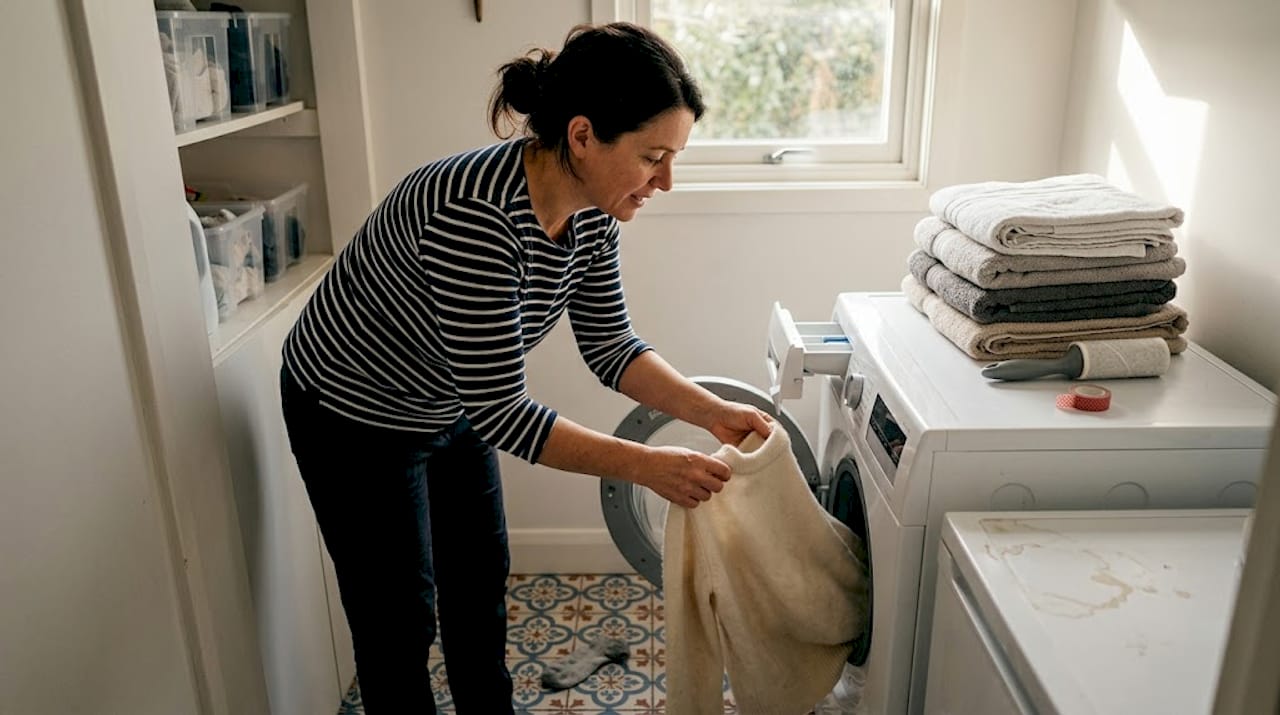
The most reliable prevention method is pre-washing. Wash and dry your fabric before cutting, using the same care method the finished item will receive. This releases most of the relaxation shrinkage upfront, so your project dimensions stay stable after construction.
You have three main pre-shrinking options:
Always read the care label before doing anything. The label tells you the manufacturer’s recommended washing temperature, drying method, and whether dry cleaning is required. Following care instructions can reduce shrinkage by preserving fiber integrity over the long life of your project.
Synthetic fabrics like polyester and nylon are naturally more stable. They’re a smart choice for projects where dimensional accuracy is critical, such as fitted home decor or structured bags. When you need stretch and stability together, understanding fabric stretch and fit helps you pick the right material from the start.
Essential prevention steps at a glance:
“Careful preparation saves time and material.”
That simple idea is the core of every successful sewing project. A few extra minutes of prep before cutting will always outweigh the frustration of recutting after a surprise shrink.
Here’s an honest take from someone who’s learned the hard way. Most sewists only discover how much shrinkage matters after they’ve already made a costly mistake. A garment that fits perfectly on the dress form suddenly feels snug after one wash. A quilt top that was perfectly squared turns into a puzzle of misaligned blocks. The mistake stings because it was invisible until it was too late.
What industry professionals know that most home crafters don’t is that shrinkage planning ranks higher in importance than fabric color matching or seam finishing. You can fix a seam. You cannot unshrink a finished quilt. Even a 1% to 2% error in shrinkage estimation can shift a fitted garment from comfortable to unwearable.
The mindset shift that makes the biggest difference is treating shrinkage as a design step, not an afterthought. Build it into your cutting layout. Build it into your yardage calculation. Build it into your washing plan. When you do that, shrinkage stops being a surprise and becomes just another variable you’ve already accounted for.
Smart saving money on fabric also means buying enough to cover shrinkage from the start, rather than scrambling to find matching yardage from a dye lot that’s long gone. Prevention is always cheaper than correction.
Ready to put your new shrinkage knowledge into action? Starting with quality, well-labeled fabrics makes every step of the process easier, from pre-washing to final construction.

At fabric-fabric.com, you’ll find a wide selection of fabrics organized by use and fiber type, so you can make informed choices from the very beginning. Whether you’re shopping for home decor fabric by the yard or looking for specialty options like our high-quality backdrop fabrics, every listing includes clear material details to help you plan with confidence. Browse the full collection and take the guesswork out of your next project.
Natural fibers like cotton, linen, and wool shrink the most, while synthetics like polyester are far more stable and rarely change size after washing.
Most natural fabrics shrink between 2% and 10% in the first wash, so always test a swatch before cutting your full yardage.
Pre-washed fabric may still shrink minimally with repeated washing, which is why following care instructions consistently matters throughout the life of your project.
Pre-wash your fabric before cutting and always follow the care label. Following care instructions is the single most effective way to minimize unexpected shrinkage.
Yes. Allow for extra yardage beyond your pattern requirements, especially when working with natural fibers that are known to shrink between 3% and 10%.