

 US Dollar
How to sew silk step by step for flawless results
Posted by BLG on 2026 Mar 25th
Posted by BLG on 2026 Mar 25th


Sewing silk can feel like taming a wild creature. The fabric slips, shifts, and puckers at the slightest misstep, leaving even experienced sewers frustrated. But silk doesn’t have to be intimidating. With the right preparation, tools, and techniques, you can create stunning garments that showcase silk’s natural beauty and drape. This guide breaks down every step, from selecting beginner-friendly silk types to achieving professional seam finishes, so you can sew silk with confidence and precision.
| Point | Details |
|---|---|
| Begin with less slippery silks | Starting with easier silks helps build confidence before tackling chiffon or charmeuse. |
| Pre wash silk | Pre wash silk in lukewarm water to remove shrinkage before cutting and assembling your pattern pieces. |
| Sharp tools and weights | Use sharp rotary cutters or fabric scissors and pattern weights to prevent slipping and ensure accurate pieces. |
| Spray stabilizer and press cloth | Lightly spray stabilizer on the fabric to control slip and press with a cloth to protect fibers. |
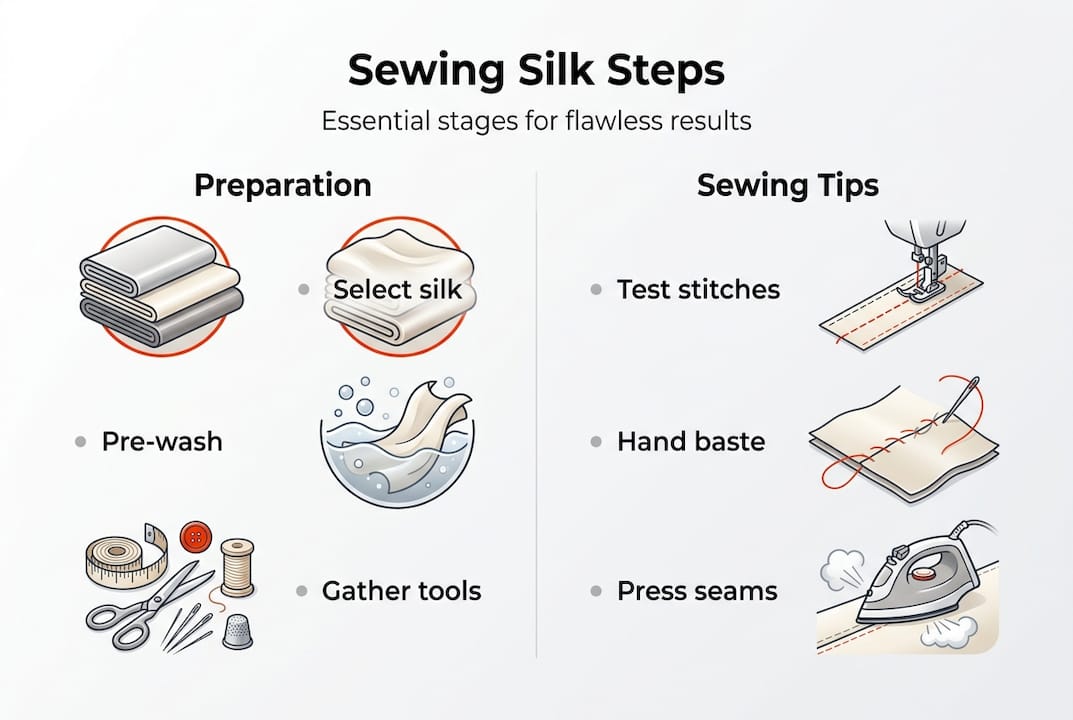
Success with silk starts before you ever touch your sewing machine. The preparation phase determines whether your project flows smoothly or becomes a frustrating battle with slippery fabric.
Choosing the right silk makes all the difference for beginners. Less slippery silks like crepe de chine, noil, or twill provide a forgiving learning curve. These varieties have enough texture or weight to stay put during cutting and sewing. Avoid chiffon and charmeuse for your first silk project. Their extreme slipperiness tests even experienced sewers and can turn a simple garment into an exercise in frustration.
Pre-washing silk prevents heartbreak later. Pre-wash silk fabric in lukewarm water to eliminate shrinkage before you cut your pattern pieces. Hand wash gently or use your machine’s delicate cycle with mild detergent. Skip the dryer completely. Instead, lay silk flat on a clean towel or press while still slightly damp using a press cloth and low heat setting. This careful approach protects the delicate fibers while preparing your fabric for construction.
Gathering the right tools transforms silk from intimidating to manageable. You’ll need sharp rotary cutters or fabric scissors, because dull blades snag and distort silk’s fine weave. Pattern weights keep fabric flat during cutting without the holes pins would leave. Fine polyester or cotton thread in size 50 or 60 creates nearly invisible seams. A press cloth protects silk from direct heat damage. Spray stabilizer adds temporary body to slippery silk, making it behave during cutting and initial stitching.
Pro Tip: Set up a dedicated clean workspace before handling silk. Even tiny bits of dirt or rough surfaces can snag these delicate fibers. Cover your cutting table with a clean sheet if needed, and keep all tools within easy reach to minimize fabric handling.
Essential silk sewing supplies:
| Silk Type | Slipperiness Level | Best For | Beginner Friendly |
|---|---|---|---|
| Silk noil | Low | Structured garments, first projects | Yes |
| Crepe de chine | Medium | Blouses, dresses, scarves | Yes |
| Silk twill | Medium | Tailored pieces, pants | Yes |
| Charmeuse | Very high | Lingerie, elegant draping | No |
| Chiffon | Extremely high | Overlays, special occasion | No |
Understanding why choose silk fabrics helps you appreciate the preparation investment. Learning about silk fabric origins and uses deepens your connection to this luxurious material.
Cutting and stitching silk requires precision and patience. These steps eliminate the common problems that make sewers want to abandon silk projects halfway through.
Cutting silk accurately:
Machine settings make or break silk sewing success. Set stitch length between 1.5mm to 2.5mm depending on your silk’s weight. Lightweight silks need shorter stitches around 1.5mm to 2mm, while heavier silks can handle 2mm to 2.5mm. Use fine polyester or cotton thread that won’t create bulk in your seams. Install a microtex or sharp universal needle in size 60/8 to 70/10, matching needle size to fabric weight.
Tension problems cause most puckering issues. Tension issues cause 70% of puckering, so always test on fabric scraps first. Start with your machine’s default tension, then adjust incrementally if you see puckering. Lower the top tension slightly if seams pucker. The goal is balanced stitches where top and bobbin threads meet in the middle of the fabric layers.
Preventing fabric shift requires strategic preparation. Hand basting or clips prevent shifting during machine sewing. Take time to hand baste seams that need precise matching, or use fabric clips designed for delicate materials. Hold fabric taut with gentle, even pressure both before and after the presser foot while sewing. This prevents the feed dogs from pushing fabric unevenly and creating distortion.
Pro Tip: Place tissue paper under silk while sewing to stabilize the fabric and reduce puckering. The paper tears away easily after stitching but provides crucial support during the sewing process.
Machine setup checklist:
| Silk Weight | Recommended Stitch Length | Needle Size | Thread Type |
|---|---|---|---|
| Lightweight (chiffon, organza) | 1.5mm to 2mm | 60/8 to 65/9 | Fine polyester |
| Medium (crepe de chine, charmeuse) | 2mm to 2.25mm | 65/9 to 70/10 | Fine polyester or cotton |
| Heavyweight (dupioni, twill) | 2.25mm to 2.5mm | 70/10 to 80/12 | Cotton or polyester |
Following an apparel sewing workflow guide keeps your project organized. Understanding fabric puckering prevention helps you troubleshoot problems quickly.
Proper seam finishes elevate homemade silk garments from amateur to professional. These techniques prevent fraying while adding durability and visual appeal.
French seams work beautifully for sheer and lightweight silks, enclosing raw edges completely within the seam. This technique creates a clean finish visible from both sides, perfect for unlined garments. Sew the first seam with wrong sides together, trim to 1/8 inch, press, then fold right sides together and sew again to encase the raw edges.
Baby hems and rolled hems provide narrow, delicate edges ideal for silk scarves, sleeve edges, and hem finishes. These techniques create minimal bulk while preventing fraying. A rolled hem foot attachment makes the process faster and more consistent.
Pinking shears or serging suit lined silk garments where seam finishes won’t show. Pinking creates a zigzag edge that resists fraying without adding bulk. Serging encloses edges with thread, creating a professional finish quickly. Choose the method based on your equipment and the garment’s construction.
Hong Kong seam finishes represent couture-level construction. This technique encases seam allowances with bias strips of lightweight fabric, creating beautiful, durable seams worthy of high-end ready-to-wear. The extra time investment pays off in garments you’ll treasure for years.
Pressing requires as much care as sewing. Always use a press cloth between your iron and silk to prevent scorching or creating shine marks. Set your iron to the lowest heat setting that effectively removes wrinkles. Press with vertical up and down motions rather than sliding the iron, which can stretch and distort silk’s delicate weave.
Pro Tip: Press seams open or to one side using only vertical lifting motions. Never drag your iron across silk, as the heat and pressure can permanently stretch the fabric and ruin your garment’s fit.
Seam finish selection guide:
| Seam Finish | Best Silk Types | Pros | Cons |
|---|---|---|---|
| French seam | Lightweight, sheer | Clean both sides, no fraying | Adds slight bulk, requires precision |
| Baby hem | All weights | Narrow, delicate finish | Time consuming by hand |
| Rolled hem | Lightweight to medium | Professional edge, minimal bulk | Requires special foot or practice |
| Pinked | Medium to heavy, lined | Fast, reduces fraying | Visible raw edge, less durable |
| Hong Kong | All weights | Couture quality, very durable | Time intensive, requires bias strips |
| Serged | Medium to heavy | Fast, secure | Requires serger, adds slight bulk |
Following a complete apparel sewing workflow ensures you don’t skip critical finishing steps that make the difference between homemade and handmade.
Now that you understand how to sew silk successfully, sourcing quality materials becomes your next priority. Fabric Fabric offers carefully curated silk fabrics suitable for every skill level and project type. From beginner-friendly crepe de chine to luxurious charmeuse for advanced sewers, you’ll find exactly what your next garment needs.

Beyond fabric selection, having the right tools makes every step easier. Fabric Fabric stocks essential sewing supplies tailored to working with delicate materials like silk. Sharp cutting tools, fine threads, and specialty notions help you achieve professional results. Shopping from trusted suppliers who understand fabric quality ensures your finished garments look and feel exceptional. Browse backdrop fabrics for project inspiration or explore home decor fabric selections to expand your creative possibilities.
Silk noil, crepe de chine, and silk twill offer the most forgiving textures for beginners. These varieties have enough body and grip to stay in place during cutting and sewing, unlike extremely slippery charmeuse or chiffon. Start with these manageable types to build your skills and confidence before tackling more challenging silk varieties.
Cut silk in a single layer using sharp rotary cutters or scissors, and secure pattern pieces with weights rather than pins. Apply spray stabilizer lightly across the fabric before laying out your pattern to add temporary grip. Work on a clean, slightly textured surface rather than a slick table, and cut with smooth, confident strokes to maintain accuracy.
Set your machine to 1.5mm to 2mm stitch length for lightweight silks like chiffon or habotai. Shorter stitches provide better seam strength and prevent the fabric from puckering between stitches. Always test on scraps first, adjusting length based on how your specific silk behaves with your machine’s tension and feed.
Puckering usually results from incorrect thread tension, which causes 70% of seam problems in delicate fabrics. Test your tension on scraps and adjust incrementally until stitches look balanced. Other causes include too-long stitch length, pulling fabric while sewing, or using a dull needle that pushes rather than pierces fibers cleanly.
Hand wash silk garments in cool water with gentle detergent, or use your machine’s delicate cycle in a mesh bag. Never wring or twist silk. Instead, roll in a towel to remove excess water, then lay flat or hang to dry away from direct sunlight. Press while slightly damp using a press cloth and low heat to maintain the fabric’s smooth texture and prevent damage.
Fine polyester or cotton thread in size 50 or 60 works best for silk, creating nearly invisible seams that don’t add bulk. Regular all-purpose thread can work for heavier silks like dupioni, but avoid it for lightweight varieties where the thread thickness will show through or create puckering. Match your thread weight to your fabric weight for the most professional results.