

 US Dollar
Crewel embroidery: Techniques, history, and home decor uses
Posted by BLG on 2026 May 14th
Posted by BLG on 2026 May 14th

TL;DR:
- Crewel embroidery primarily uses wool yarn stitched on sturdy, tightly woven fabrics like linen, creating a textured, raised surface. It employs classic embroidery stitches such as stem, satin, and French knots, which adapt well to wool’s thicker, grip-rich nature. Originating from Jacobean England, crewel’s traditional designs are now popular for modern home decor items like pillows, wall art, and upholstery.
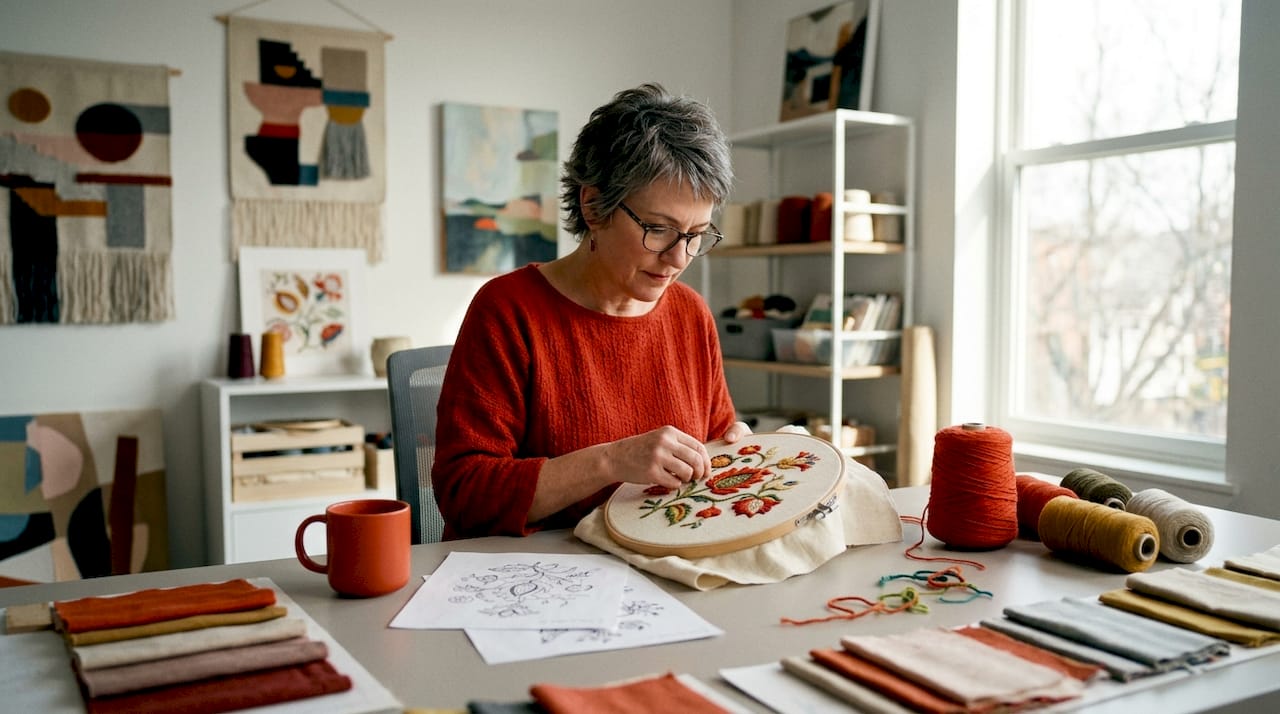
If you’ve ever stood in a craft shop holding a skein of wool yarn and wondered whether it’s “regular” embroidery or something else entirely, you’re not alone. Crewel embroidery confuses beginners constantly, mostly because the name suggests a whole separate discipline when the real distinction is simpler than it sounds. This guide breaks down exactly what crewel embroidery is, the stitches that bring it to life, where it comes from historically, and how you can use it to transform everyday home decor into something genuinely beautiful.
| Point | Details |
|---|---|
| Defined by wool thread | Crewel embroidery stands out for its use of crewel wool yarn on strong woven fabric. |
| No exclusive stitches | The technique uses common embroidery stitches, letting the material provide texture and style. |
| Rich decorative heritage | Crewelwork is rooted in historic home furnishings, making it perfect for wall hangings and modern home projects. |
| Beginner-friendly start | If you know basic embroidery, you can try crewel—just adjust for wool’s behavior in fabric and tension. |
| Material choice matters | Selecting the right wool and sturdy fabric is crucial for a successful, lasting crewel embroidery design. |
The first thing to clear up is the definition itself. Many beginners assume crewel embroidery means a specific style of pattern or a set of unusual stitches. In reality, crewel embroidery is surface embroidery defined primarily by using crewel wool, typically 1-ply or 2-ply wool yarn, to stitch designs onto fabric. That’s it. The wool is the defining factor, not the pattern, not the color scheme, not the subject matter.
This distinction matters because it immediately opens the door for beginners. You don’t need to learn an entirely new stitch library. You need to understand wool and how it behaves on fabric.
Speaking of fabric, crewelwork is typically stitched on tightly woven, sturdy ground fabrics such as linen or linen twill, both of which are commonly used for home decor textiles. These fabrics support the weight and texture of wool without distorting, which is critical. A flimsy cotton quilting fabric will pucker and shift under wool threads. A solid linen twill holds its shape even after hours of stitching.
The reason crewel often gets confused with other embroidery lace fabrics or needlework styles comes down to visual similarity. From a distance, a crewel piece and a standard embroidered piece can look alike. Up close, though, crewel has a raised, textural quality from the wool that floss or silk threads simply can’t replicate.
Here’s a quick look at the materials you’ll need to get started:
| Material | Type | Why it matters |
|---|---|---|
| Crewel wool yarn | 1-ply or 2-ply wool | The defining material; adds texture and loft |
| Ground fabric | Linen or linen twill | Provides stability and supports wool weight |
| Crewel needle | Sharps or chenille needle | Large eye accommodates wool thread |
| Embroidery hoop | Wooden or plastic frame | Maintains even fabric tension during stitching |
| Scissors | Small embroidery scissors | Precision cutting of wool threads |
| Transfer tools | Chalk, tracing paper, or washable pen | Transfers design onto fabric before stitching |
Key materials you’ll need:
Pro Tip: Before committing to a full project, stitch a small test swatch to see how your specific wool and fabric interact. Pull tension gently and consistently. Wool is not as slippery as floss, so it can grab the fabric differently, especially on tighter weaves. Paying attention to how thick wool threads sit on your fabric makes a huge difference in the finished result.
For inspiration on different woven fabric examples that can work as crewel grounds, it helps to understand what “tightly woven” actually looks like across different textiles before you buy.
With your materials ready, the natural next question is: what stitches do you actually use? Here’s the good news. Crewel embroidery commonly uses classic embroidery stitches, not “crewel-only” stitches, layering them to create outline, filling, texture, and shading effects. If you’ve already learned stem stitch or satin stitch, you’re already partway there.
The difference is in how wool responds to these stitches versus how cotton floss does. Wool has more body and grip, so the same satin stitch that lies flat with floss will appear raised and slightly dimensional with crewel wool. This is exactly what gives crewelwork its signature look.
Stitches commonly used in crewelwork:
| Stitch | In general embroidery | In crewel embroidery |
|---|---|---|
| Stem stitch | Clean line with floss | Thicker, more textural line with wool |
| Satin stitch | Smooth, flat coverage | Padded, raised appearance |
| French knots | Small, delicate dots | Larger, bolder texture dots |
| Long-and-short | Smooth color blending | Rich shading with dimensional depth |
| Chain stitch | Lightweight outline | Substantial, rounded outline |
For design with embroidery patterns, understanding stitch direction and layering early saves a lot of unstitching later.
Here is a simple step-by-step process for stitching your first small crewel motif, such as a leaf:
Pro Tip: Mix at least two or three stitch types in any motif. The contrast between a solid satin-filled center and a textured French knot border adds depth that flat, single-stitch designs simply can’t achieve. Just stay mindful of wool’s thickness so the piece doesn’t become stiff or bunchy.
Understanding techniques is only half the journey. Knowing where crewel comes from adds real depth to the craft, and it has a genuinely impressive past.
Crewel embroidery is historically associated with wool decorative needlework in periods such as medieval times and especially the Jacobean era, where it was popular for household furnishings including curtains and bed hangings. The Jacobean period, roughly covering the early 17th century during the reign of King James I of England, saw an explosion of interest in decorative textiles. Wealthy households commissioned elaborate crewelwork panels featuring fantastical botanical motifs: curling tree branches, oversized stylized flowers, exotic birds, and dense foliage that didn’t quite look like anything in nature.
“Crewel embroidery carries centuries of domestic artistry in every stitch. Its roots in Jacobean England gave us the iconic Tree of Life motif that still appears on modern cushions, curtains, and upholstery worldwide.”
This wasn’t just art for display. Crewelwork was practical. Bed hangings kept drafts out of stone manor houses. Wall panels added insulation as well as beauty. The craft was functional first and decorative second, which tells you a lot about why linen twill became the standard ground fabric. It needed to hold up under real-world use.
The Jacobean influence gave crewelwork a signature aesthetic: organic, asymmetrical, and lush. You’ll recognize it immediately in the bold, flowing lines and the sense that every inch of fabric is alive with growth and movement.
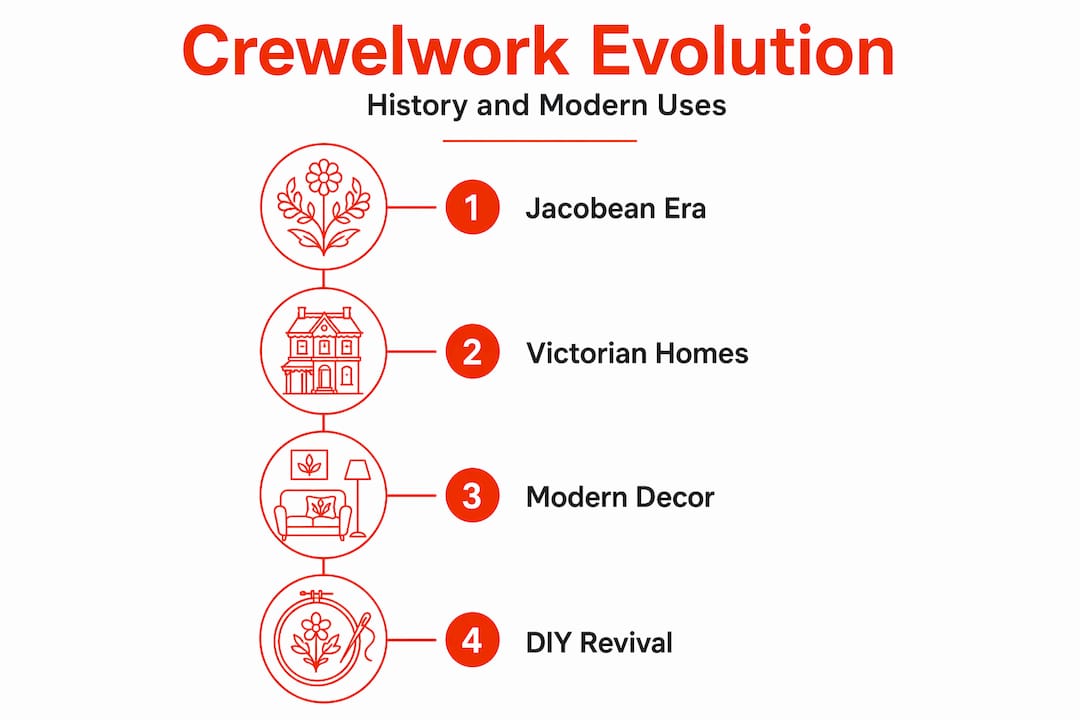
Modern crafters have taken these same visual principles and applied them to scaled-down projects that fit contemporary homes. You don’t need to stitch a six-foot bed hanging. You can work the same Jacobean leaf-and-flower motif onto a throw pillow and get a piece that looks genuinely heritage-inspired while fitting on your couch.
Classic and contemporary items decorated with crewel embroidery:
For those looking at fabric for home decor projects, crewel is one of the most rewarding techniques because the finished pieces look expensive and labor-intensive even when the project itself is relatively small.
Now that you know the heritage and what makes crewel unique, it’s time to address the hands-on details of starting your own project. The good news is that beginner mistakes are predictable, which means they’re also preventable.
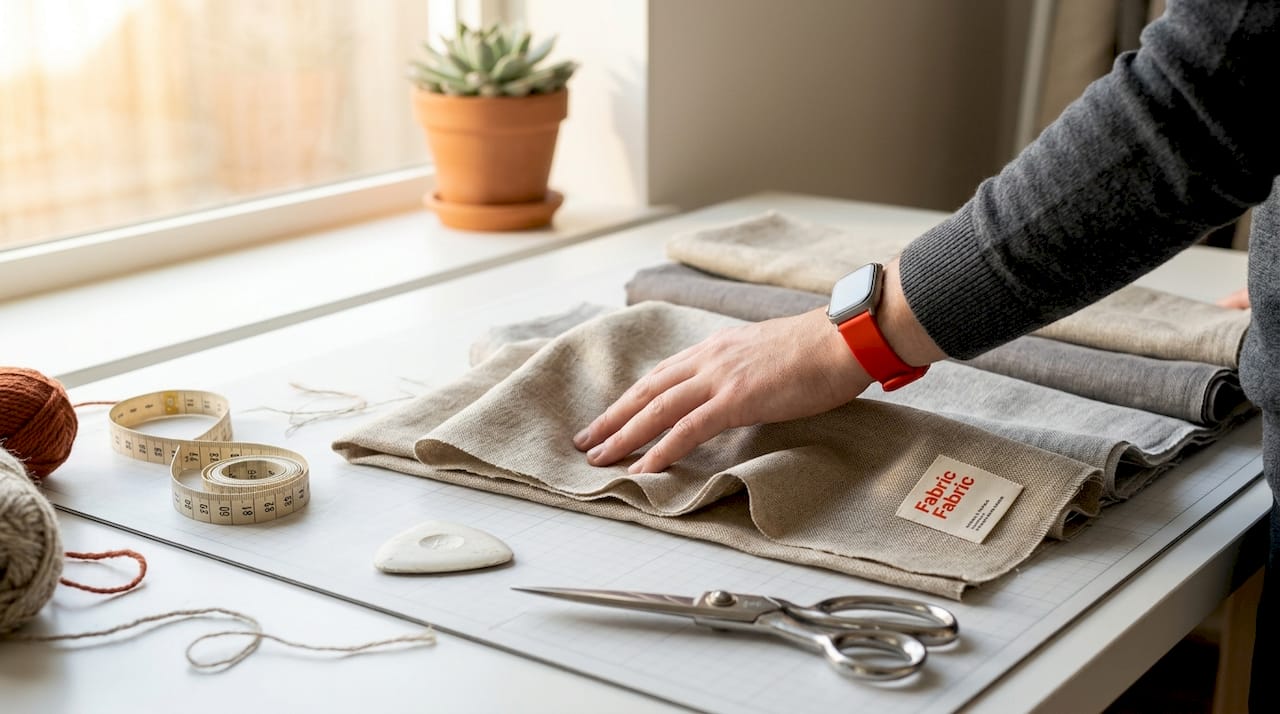
Start with fabric selection. Choose strong, tightly woven fabrics like linen twill for the best results. Avoid anything stretchy or loosely woven. Stretch distorts the design as you stitch, and loose weaves allow wool to slip between threads rather than sitting cleanly on the surface. If you’re unsure whether a fabric is suitable, hold it up to the light. Very little light should pass through a good crewel ground fabric.
Wool thread can add loft and texture and may even felt together if it’s 100% wool, so fabric choice and stitch placement and tension all matter more than they do with synthetic or cotton threads. Felting happens when wool fibers interlock from friction and moisture. In embroidery, this can occur if you pull threads too tight repeatedly across the same area, or if you handle the work with damp hands. The fix is simple: work with a relaxed grip and keep your hands dry.
Troubleshooting common beginner problems:
Pro Tip: Start your first crewel project with a pillow cover panel. A 12-inch square is a manageable size, it has real decorative impact when finished, and any small mistakes are easy to hide in the seams. A pillow also lets you practice both filling stitches and outlining stitches in a single piece.
For those just getting started, a good sewing guide for beginners can help you understand how to handle and prepare fabric before you even thread your needle, which sets you up for much cleaner crewel results.
Here’s the perspective shift that genuinely changes how crafters approach crewel embroidery: the word “crewel” names the thread, not the technique. When you understand this, the whole thing becomes far less intimidating.
We’ve seen beginners spend weeks trying to find “the crewel stitch” before starting a project. They flip through guides looking for a unique method that sets crewel apart from regular embroidery. That search is a dead end because no such stitch exists. Treat crewel as a material-based technique, specifically wool yarn on woven fabric, rather than as a unique stitch pattern, and you can use the same broad stitch family of outline, filling, knots, and shading while simply adapting to wool’s behavior.
This matters because it changes your learning curve dramatically. If you already know how to do a stem stitch in cotton floss, you can do it in crewel wool today. The adaptation comes in understanding how wool behaves differently: it’s thicker, it grips the fabric, it creates more visible texture, and it requires slightly more deliberate tension management.
The real skill in crewelwork is developing a feel for the wool itself. How tightly does it want to sit on this fabric? How many strands give the right coverage without stiffness? These questions get answered through practice, not through memorizing new stitches.
For beginners who browse needlework guides looking for the “next level” after basic embroidery, crewelwork is a natural and deeply satisfying step. It uses familiar techniques but rewards patience and material awareness with results that look genuinely complex. A well-executed crewel pillow looks like it took expert skill. Often, it just took good wool, the right fabric, and consistent attention to tension.
If you can work a stem stitch, you can work crewel embroidery. Start with the wool. The rest follows naturally.
Feeling inspired to try crewel embroidery for your next decor project? The right fabric makes a bigger difference than most beginners expect. Starting on the wrong surface leads to frustration fast, while the right ground fabric lets your wool stitches shine from the very first project.

At fabric-fabric.com, you’ll find a curated selection of home decor fabric options that work beautifully as crewel grounds, including sturdy, tightly woven options suited to wool thread. Whether you’re working on a pillow panel, a wall hanging, or a more ambitious upholstery project, exploring the backdrop fabric options available on the site gives you a practical starting point for choosing the right surface for your specific design. Quality fabric from the start sets your crewel project up for success before you even thread your needle.
Crewel embroidery is defined by its use of wool yarn stitched on strong, woven fabrics; crewelwork is surface embroidery defined primarily by wool thread, while regular embroidery uses cotton floss, silk, or synthetic threads on any fabric type.
Linen and linen twill are ideal because tightly woven, sturdy ground fabrics support wool’s weight and texture without distorting the design over time.
It’s quite beginner-friendly because crewel uses classic embroidery stitches that most crafters already know; the main learning curve is adjusting to how wool thread handles and behaves on fabric.
You need a needle with a large enough eye to pass wool yarn through smoothly, often called a chenille or tapestry needle, plus a sturdy hoop to keep your fabric taut and even while you work.
Crewel is durable when worked on sturdy home-decor textiles like linen twill, making it well-suited for upholstery and cushions; hand-washing in cool water is safest to preserve the wool’s texture and shape.