

 US Dollar
Mastering fabric dyeing: techniques, tips, and pitfalls
Posted by BLG on 2026 Apr 5th
Posted by BLG on 2026 Apr 5th

TL;DR:
- Fabric dyeing stages affect color penetration, durability, and flexibility, influencing final results.
- Dyeing methods like batch and continuous vary in scale, efficiency, and application, impacting project outcomes.
- Proper pre-treatment, equipment choice, and sustainable practices are crucial for consistent, eco-friendly dyeing.
Not all dyed fabrics are created equal, and the process behind the color matters just as much as the color itself. Many hobbyists and professionals assume dyeing is a single, uniform step, but the stage at which you dye, the method you choose, and the parameters you control all shape your final result in ways that are hard to reverse. A poorly matched process leads to uneven color, weak colorfastness, and wasted materials. This guide walks you through every critical layer of fabric dyeing, from foundational stages and batch versus continuous methods to machine selection, troubleshooting common failures, and making smarter, more sustainable choices.
| Point | Details |
|---|---|
| Dyeing stage matters | The point at which fabric is dyed—fiber, yarn, fabric, or garment—greatly impacts colorfastness and cost. |
| Match method to project | Choose batch or continuous dyeing processes based on the project size and desired effect. |
| Troubleshoot for success | Tackle issues like bleeding and uneven color with proper pre-treatment, detergent, and testing. |
| Go sustainable | Modern eco-friendly dyeing approaches, like solution dyeing, minimize environmental impact. |
Understanding when dye enters the textile supply chain is the first step toward choosing the right process. Fabric dyeing occurs at different stages, each affecting cost, effect, and process outcome. The four primary stages are fiber dyeing, yarn dyeing, fabric (piece) dyeing, and garment dyeing.
Fiber dyeing happens before fibers are spun into yarn. This gives dye the deepest possible penetration and produces the most durable colorfastness. It’s the go-to method for creating heather effects, where multiple fiber colors are blended together during spinning to create that soft, mixed-tone look you see in athletic wear and cozy knitwear.
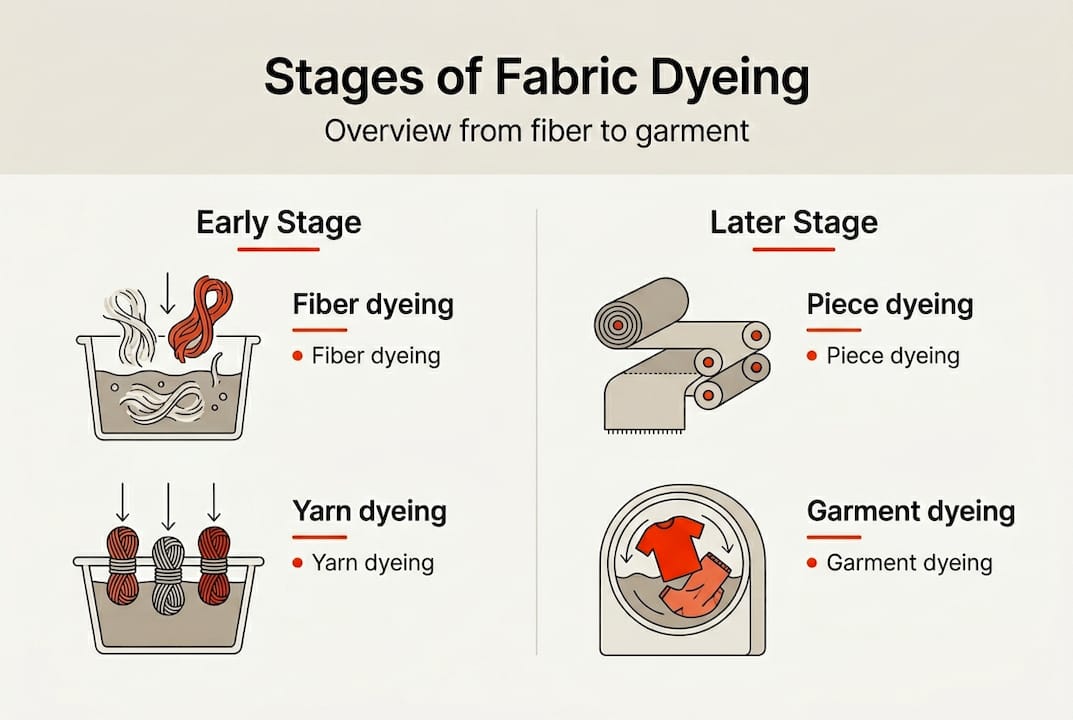
Yarn dyeing occurs after spinning but before weaving or knitting. It’s ideal for creating stripes, plaids, and checks because the pattern is built directly into the fabric structure. Think classic gingham or chambray. The color is locked in at the yarn level, which means excellent penetration and consistency.
Piece (fabric) dyeing is the most common commercial method. Fabric is dyed after it’s been woven or knitted, making it highly flexible for responding to color trends. If a retailer needs to shift from sage green to dusty blue mid-season, piece dyeing makes that pivot possible. The tradeoff is slightly less penetration compared to fiber or yarn dyeing.
Garment dyeing happens at the very end, after the garment is fully constructed. It creates a lived-in, slightly irregular look that’s popular in fashion. It also allows for last-minute color decisions, but it comes with higher risk of uneven dye uptake at seams and stress points.
| Dyeing stage | Color penetration | Flexibility | Typical use case |
|---|---|---|---|
| Fiber | Highest | Lowest | Heather blends, performance wear |
| Yarn | High | Low | Stripes, plaids, wovens |
| Piece (fabric) | Medium | High | Solid colors, trend-driven fashion |
| Garment | Variable | Highest | Fashion, artisan, vintage looks |
Key tradeoffs to keep in mind:
Experts recommend delaying dyeing for flexibility, but fiber-stage dyeing gives the strongest fixation. For hobbyists working with dyeing processes overview, understanding this tradeoff upfront saves significant rework later.
Pro Tip: Always prewash your fabric before dyeing, regardless of stage. Sizing agents and finishes left on new fabric can block dye uptake and cause patchy results.
Once you know when to dye, you need to decide how. The three primary categories are batch (exhaust) dyeing, continuous dyeing, and combination methods. Each suits a different scale, fabric type, and project goal.
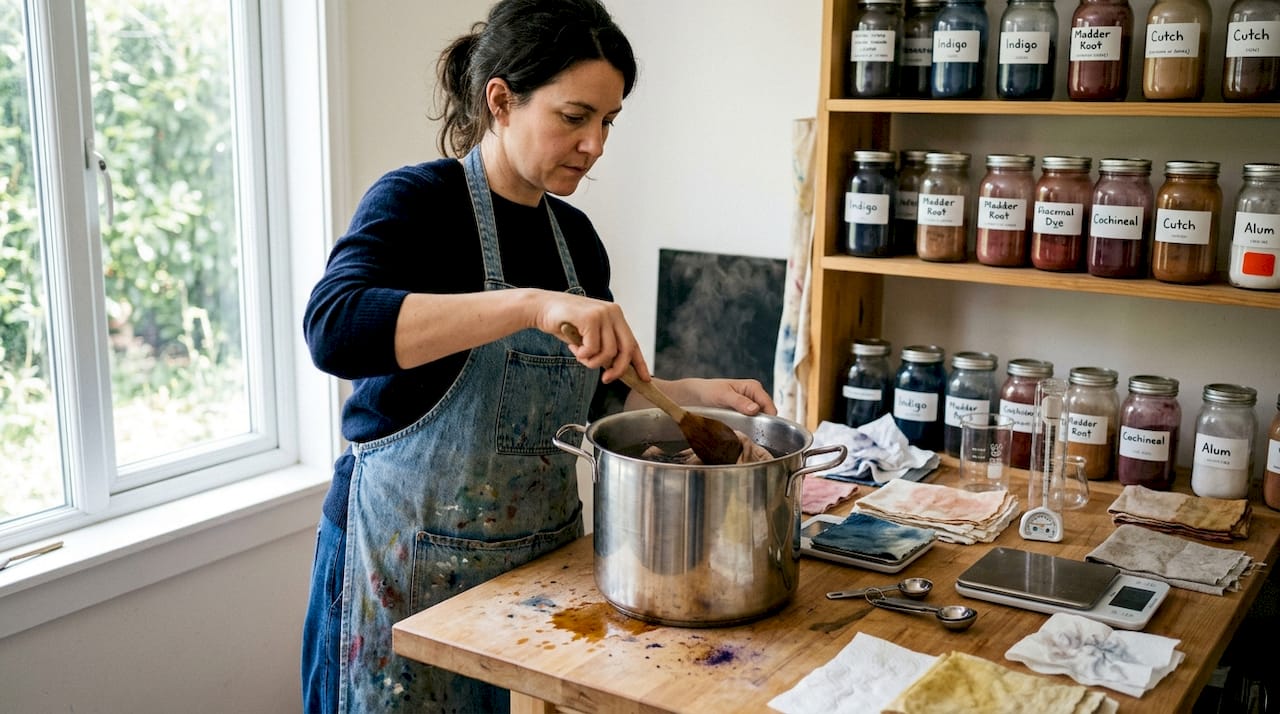
Batch or exhaust dyeing is flexible and good for small lots; continuous dyeing is efficient for large runs. In batch dyeing, fabric is immersed in a dye bath and the dye gradually exhausts (transfers) from the liquid into the fiber over time. This is the method most hobbyists use, whether they’re working in a pot on the stove or a small washing machine. It’s forgiving, adjustable mid-process, and works well with a wide range of dye types.
Continuous dyeing, by contrast, moves fabric through a series of dye application and fixation stages in one uninterrupted run. It’s built for efficiency and volume. Think of large textile mills producing thousands of meters of solid-color fabric per day. The setup cost is high, but per-meter cost drops dramatically at scale.
Combination methods blend elements of both, often applying dye continuously and then batch-fixing it. This is common in commercial reactive dyeing of cotton.
Here’s how a classic batch dyeing process unfolds, step by step:
When troubleshooting fabric dyeing defects, knowing which step went wrong narrows your fix considerably.
“Matching your dyeing method to your project scale and fabric type is not optional. It’s the single biggest factor in whether your results are repeatable or just lucky.”
Equipment and process parameters are where theory meets practice. The wrong machine for your fabric type, or an off-target liquor ratio, can undo even the best dye selection.
Common machines used in fabric dyeing include:
Machine selection is based on fabric type, and key parameters include liquor ratio, temperature, pH, and time. The liquor ratio (the ratio of water to fabric weight) affects how concentrated the dye bath is and how evenly dye distributes. A ratio that’s too low leads to uneven uptake; too high wastes dye and chemicals.
Key factors for machine and parameter selection:
Pro Tip: Before committing to a full project, cut off-cuts from your actual fabric and run small lab-scale tests. Even a 10-gram sample can reveal how your fabric will behave with a specific dye and method.
Even experienced dyers hit problems. Knowing what to look for and how to fix it quickly is what separates a confident dyer from a frustrated one.
Edge cases like bleeding, barre, streaks, and shade variation are common and manageable with the right adjustments. Here’s a practical troubleshooting sequence:
For fabric dye troubleshooting, always start by isolating the variable that changed between a successful and unsuccessful batch.
“Prevention beats correction every time. A 30-minute colorfastness test after dyeing saves hours of re-dyeing and heartbreak later.”
Pro Tip: After dyeing, wet a small swatch and press it against white cotton. If color transfers, you have unfixed dye that needs another wash-off cycle before the fabric is ready to use.
Dyeing is one of the most resource-intensive steps in textile production, consuming large volumes of water, energy, and chemicals. The good news is that practical, accessible alternatives are gaining traction fast.
Solution dyeing and low-water immersion (LWI) are more sustainable options with reduced chemicals and water usage. Solution dyeing adds pigment directly to the polymer before fibers are extruded, eliminating the dye bath entirely. It’s primarily used for synthetics and produces exceptional colorfastness because the color is part of the fiber structure itself.
Low-water immersion dyeing, popular with art quilters and fiber artists, uses a fraction of the water of traditional immersion dyeing. Fabric is scrunched into a container with a small amount of dye solution, creating beautiful, organic color variation as a natural byproduct of the technique.
Practical steps you can take right now for more eco-friendly dyeing:
Exploring eco-friendly finishing alongside sustainable dyeing creates a fully responsible workflow. Staying current with sustainability trends and sourcing sustainable fabrics from the start makes every step of your process more intentional.
Here’s something that rarely appears in dyeing guides: technique is often the last place your results fail. Most dyeing problems trace back to decisions made before the dye bath is even mixed.
Fabric pre-treatment and testing are more critical than any specific method. A fabric that hasn’t been properly scoured, or one that contains unknown finishes from the mill, will resist dye in unpredictable ways no matter how precise your process is. We’ve seen beautifully executed batch dye jobs produce patchy, faded results simply because the fabric wasn’t tested first.
Colorfastness starts with fabric choice. A fiber with low dye affinity, like heavily processed cotton or a synthetic blend, will never hold color the way a well-prepared natural fiber does. Choosing creative sustainable fabrics that are dye-ready from the start removes one of the biggest variables from your process.
Sustainability isn’t just an ethical choice. It’s a quality choice. Low-water immersion and solution-dyed fibers consistently outperform conventionally dyed alternatives in long-term colorfastness testing. The methods that are better for the environment also tend to produce better results. That’s not a coincidence. It reflects a deeper truth: when you reduce excess chemicals and water, you’re also reducing the variables that cause inconsistency.
Blend your method knowledge with rigorous pre-testing and a commitment to continuous learning. That combination is what separates dyers who get lucky from dyers who get results.
Putting these techniques into practice starts with one essential ingredient: the right fabric. Not every textile takes dye equally, and starting with a quality, dye-ready material makes every step of your process more predictable and rewarding.

At fabric-fabric.com, you’ll find a wide selection of fabrics suited to every dyeing method covered in this guide. From natural fibers perfect for reactive dyeing to versatile base cloths for garment dyeing, the range covers hobbyist and professional needs alike. Browse our backdrop fabric selection for large-format dyeing projects, or explore our home decor fabrics for piece-dyed applications. Quality fabric is the foundation of every great dye project, and we make it easy to find exactly what your next project needs.
Fiber-stage dyeing delivers superior penetration and colorfastness, though it requires committing to a color early in production and costs more than later-stage methods.
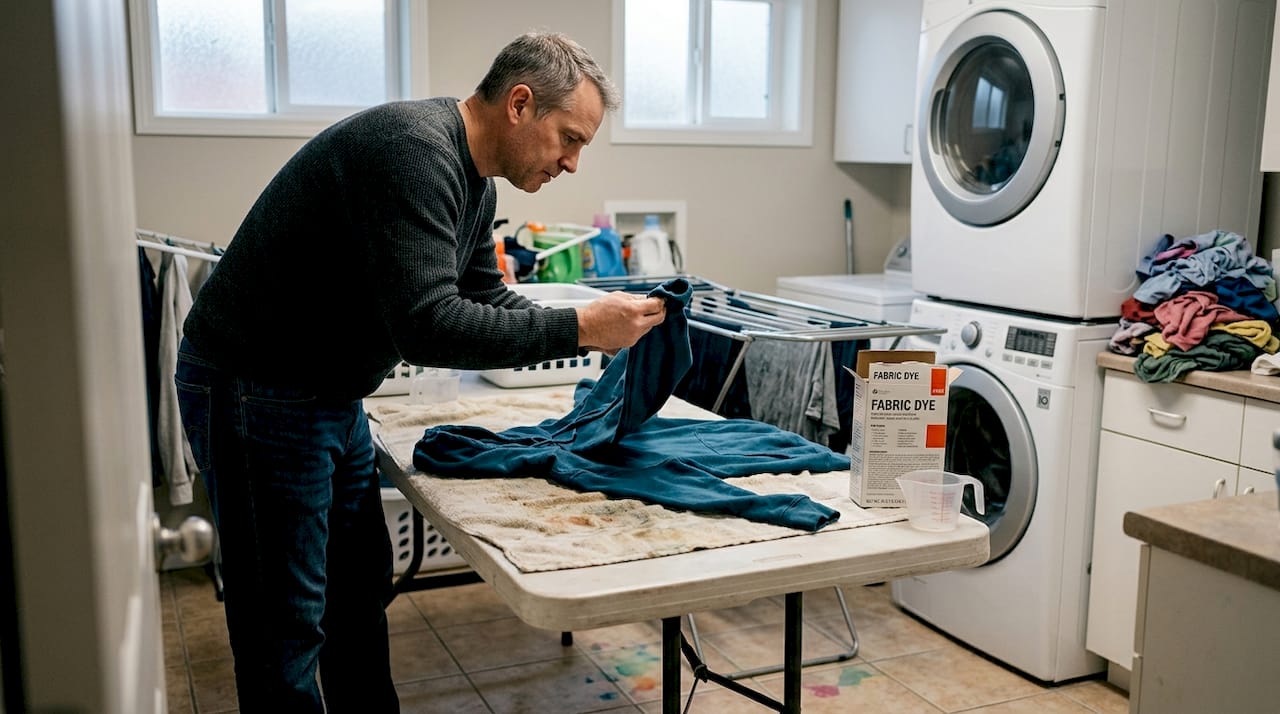
Soak dyed fabric for 24 to 48 hours in cold water, then wash with appropriate detergents like Synthrapol or Dawn to remove unfixed dye and prevent backstaining onto other fabrics.
Batch or exhaust dyeing suits small lots and flexible applications best, making it the most practical and forgiving choice for hobbyists working at home or in small studios.
Yes. Solution dyeing and LWI are both more sustainable methods that significantly reduce water consumption and chemical use compared to conventional immersion dyeing.