

 US Dollar

Fabric Cutting Tutorial: Step-by-Step for Crafters
Posted by BLG on 2026 May 27th
Posted by BLG on 2026 May 27th

TL;DR:
- Proper fabric preparation and selecting the right tools are essential for accurate cutting and avoiding wasted yardage. Techniques such as respecting the grainline, handling different fabric types carefully, and checking measurements before sewing ensure a professional finish. Building these steps into your routine leads to more consistent results and a smoother sewing process.
Crooked seams, wasted yardage, patterns that just won’t line up. If any of those sound familiar, the problem almost always starts before you pick up a needle. This fabric cutting tutorial walks you through exactly how to cut fabric accurately, from the tools you need to the techniques that separate clean results from frustrating do-overs. Whether you’re tackling a quilt, a garment, or a home decor project, what you do at the cutting table determines everything that comes after.
| Point | Details |
|---|---|
| Prep before you cut | Pre-washing and ironing fabric can improve cutting accuracy by 30%, making prep non-negotiable. |
| Use the right tools | Rotary cutters, self-healing mats, and acrylic rulers work together to deliver clean, consistent cuts. |
| Respect the grainline | Proper grain alignment reduces garment distortion by 83%, so never skip this step. |
| Adapt to your fabric | Knits, wovens, and slippery fabrics each require a different approach to avoid stretching or fraying. |
| Check before you sew | Measuring cut pieces against your pattern before sewing catches errors when they are still easy to fix. |
You can have perfect technique and still get bad results if your tools are dull, flimsy, or wrong for the job. Getting the right setup before you start is what makes every fabric cutting technique actually work.
Here is a comparison of the core cutting tools you should know:
| Tool | Best for | Pros | Cons |
|---|---|---|---|
| Rotary cutter | Straight lines, multiple layers | Fast, clean cuts on 4-6 layers | Blades dull quickly without care |
| Fabric scissors | Curves, small pieces | Precise control, easy to maneuver | Slow for long straight cuts |
| Self-healing cutting mat | All rotary cutter work | Protects blades and table surface | Takes up workspace |
| Acrylic ruler | Measuring and guiding cuts | Accurate, see-through, non-slip | Must be held firmly to avoid slipping |
| Marking tools | Transferring pattern lines | Temporary marks wash or rub out | Can smear on delicate fabrics |
Cutting mats reduce cutting distortion by up to 80% by giving your blade a consistent surface and keeping the fabric from shifting during cuts. That alone makes a mat one of the highest-return purchases in your cutting kit.
One thing most beginners overlook is blade maintenance. Rotary cutter blades dull quickly when used on paper or over pins, which is a habit that will ruin your cuts and force you to replace blades far more often than necessary. Keep a dedicated cutter for fabric only and swap the blade as soon as you notice any dragging or skipping.
Pro Tip: Label your rotary cutter with a piece of tape if you own more than one. One for fabric, one for paper, and never the two shall meet.
For more guidance on which tools belong in your setup, the 7 must-know cutting tips from Fabric-fabric cover tool selection in depth alongside practical prep advice.
Skipping fabric preparation is the single most common reason cut pieces do not match up at the sewing machine. The steps below are not optional extras. They are the foundation of accurate cutting.
Pre-wash your fabric. Cotton can shrink between 3 and 7% after its first wash. If you cut before washing, your finished project may pucker, pull, or warp the first time it goes through the laundry. Wash and dry the fabric the same way you plan to care for the finished item.
Let the fabric relax. Fabric has a kind of physical memory from being rolled or folded on a bolt. Allow knits to rest for 12 to 24 hours after unrolling, and wovens for 6 to 8 hours, before cutting. This prevents post-cut distortion that shows up after the project is finished.
Iron out every wrinkle. A wrinkle on your cutting table becomes an inaccuracy in your cut piece. Press the fabric flat with an iron set to the appropriate heat for your fiber content. Work in the direction of the grain, not across it.
Find and align the grainline. The grainline runs parallel to the selvage, which is the finished edge along the lengthwise sides of the fabric. Ignoring the selvage edge causes fabric distortion that shows up as twisting and misaligned seams in the finished piece. Learn more about why this matters at the role of fabric grain guide.
Square your edges before laying out patterns. Fold the fabric in half lengthwise with selvages together. If the cut edges do not align, the grain is off. Gently pull the fabric on the bias to rebalance it, then re-press.
Pro Tip: For ethnic garments where precise fit really matters, pre-washing and grain alignment are especially critical. The Punjabi suit cutting guide from Punjab Threads is a useful reference for applying these preparation principles to structured garment cutting.
Once your fabric is prepped and your tools are ready, the actual cutting comes down to body mechanics and method. Here is how to handle each scenario with confidence.
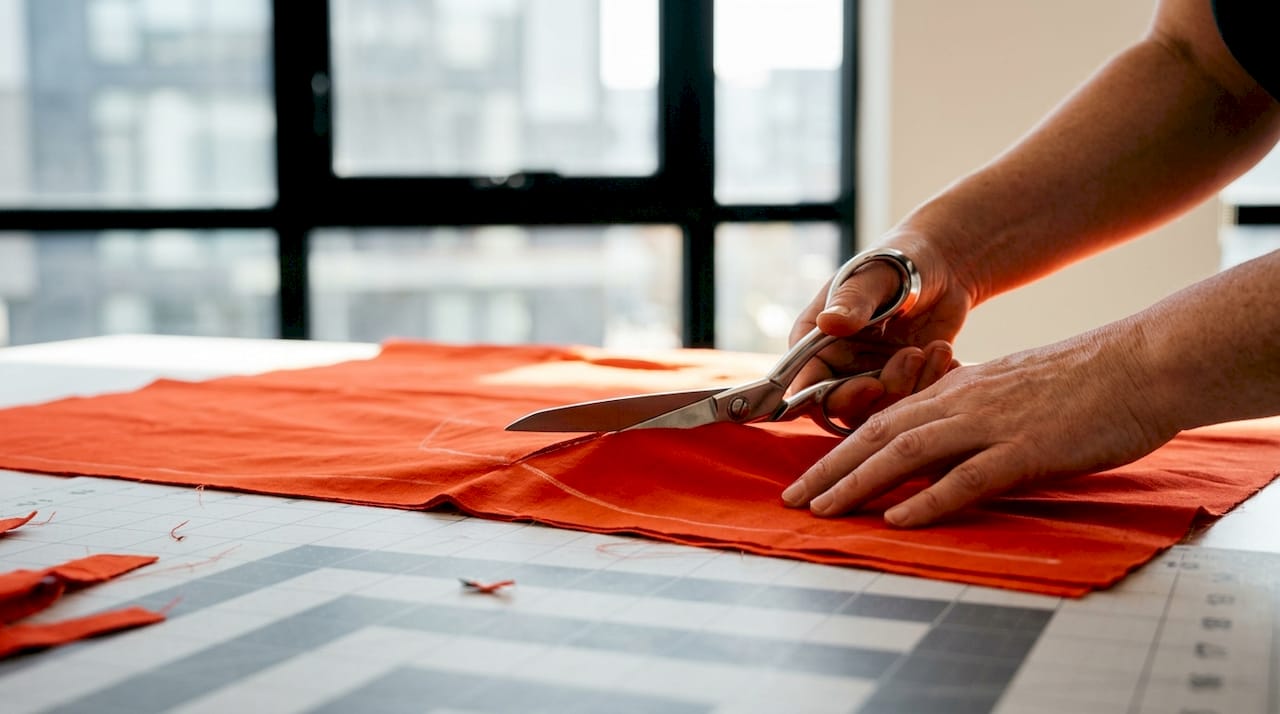
Position your acrylic ruler firmly along the cutting line. Standing while cutting and using a splayed-finger grip on the ruler prevents slipping far better than pressing down with just your palm. Your fingers should be spread wide like a spider, with each fingertip acting as a separate anchor point.
Roll the rotary cutter away from your body in one smooth, continuous motion. Stopping and restarting mid-cut almost always leaves a small notch or deviation. Apply consistent pressure and let the blade do the work.
Fabric scissors give you more control on curves than a rotary cutter. Use the tip of the blade for tight curves and longer snips for gentle arcs. Move the fabric, not your hand, to keep the cut line smooth and follow the pattern accurately.
Cutting fabric on the bias, at a 45-degree angle, unlocks 10 to 20% diagonal stretch. This is why bias-cut skirts drape so beautifully and why bias tape conforms to curves without bunching. The tradeoff is that bias-cut pieces stretch easily during handling, so move them carefully from the cutting mat to your sewing space.
Here are the most common fabric cutting mistakes and how to avoid them:
Not all fabrics behave the same under a blade, and knowing how to adapt your approach saves you from a lot of wasted material.
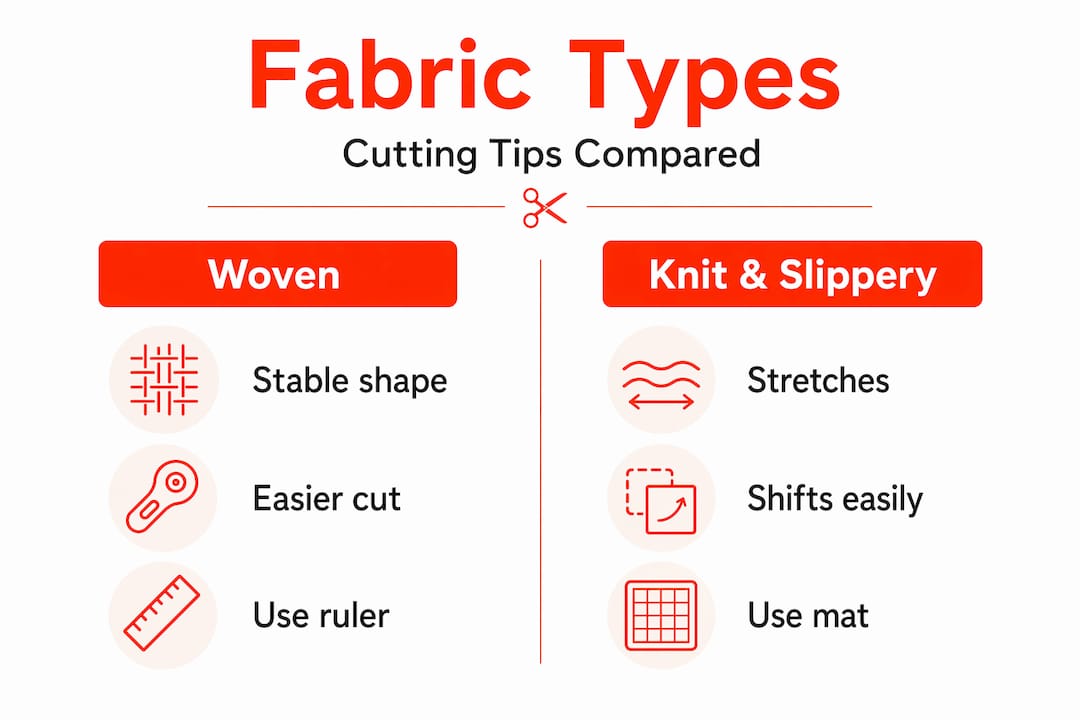
Woven fabrics like cotton, linen, and denim are the most forgiving to cut. They hold their shape on the cutting table and respond well to rotary cutters and sharp scissors. For a deeper look at how wovens compare structurally to knits, the knit vs. woven guide from Fabric-fabric is worth reading before you start cutting unfamiliar fabric.
Knit fabrics stretch, which means they can distort the moment you pick them up. Use a rotary cutter rather than scissors to avoid the pulling motion that scissors create. Cut single layers when possible, and handle the fabric as little as you can between cutting and sewing.
Slippery fabrics like chiffon, satin, and charmeuse shift constantly on the cutting table. Place a layer of tissue paper or a flannel sheet underneath the fabric to give it grip. Use sharp scissors or a very sharp rotary blade and cut slowly.
For multi-layer cutting, rotary cutters can cleanly cut through 4 to 6 layers simultaneously, which is a real time-saver for quilting or batch garment cutting. The key is to keep every layer wrinkle-free before stacking and to use weights or pins to hold the stack together throughout the cut.
Pro Tip: When cutting multiple layers, place a sheet of sandpaper (rough side up) under the bottom fabric layer. It grips the cutting mat and prevents the whole stack from creeping as you cut.
The work is not done when you put down the rotary cutter. A quick quality check before you move to the sewing machine catches errors when they are still simple to fix.
Reducing waste starts at the layout stage. Digital nesting finds optimal layout minimizing waste gaps, which is essentially what you are doing manually when you plan your pattern placement before cutting. Rotate pieces, use oddly shaped scraps as interfacing or small accents, and cut the largest pieces first before filling in with smaller ones. For more on making the most of every yard, the fabric inventory efficiency guide from Fabric-fabric covers layout planning in practical terms.
I’ll be honest with you. The first time I thought seriously about fabric grain, I rolled my eyes a little. It seemed like the kind of thing experienced sewers said to beginners just to slow them down. Then I made a pair of pants that twisted outward after one wash and I went back and re-read everything I had skipped.
The grain is not a formality. Neither is pre-washing. Neither is letting your fabric rest before you cut it. These steps feel slow when you are excited to start a project, and that is exactly why so many people skip them. But cutting is a multi-stage technical workflow where each stage affects the next. A wrinkle you do not press out becomes a seam that will not lie flat. A grain you do not check becomes a garment that hangs wrong.
My advice is to build the prep steps into your ritual rather than treating them as obstacles. Make a cup of coffee while your fabric relaxes. Press while you listen to a podcast. These are not delays. They are the actual work of sewing well. Once the prep becomes automatic, the cutting itself starts to feel easy, and you start looking forward to it.
— kev
When your preparation is solid and your technique is dialed in, the quality of the fabric itself becomes the limiting factor. There is a real difference between cutting through a fabric that holds its shape and working with something that frays, stretches, or shifts at every pass of the blade.

At Fabric-fabric, you will find fabrics that behave well under a rotary cutter and reward accurate cutting with clean edges and beautiful finishes. The backdrop fabric collection includes versatile options with the kind of body and stability that makes precise cutting much easier. For home projects, the home decor fabric range covers everything from drapery weight to upholstery, all at prices that make experimenting with new techniques affordable. Good fabric is not a luxury. It is part of getting consistent results.
A rotary cutter, self-healing cutting mat, and acrylic ruler are the core three. Sharp fabric scissors handle curves and detail work where a rotary cutter is less practical.
Weight or pin your pattern pieces before cutting and use a self-healing mat underneath. A layer of tissue paper under slippery fabrics also prevents movement during cutting.
Cotton fabrics shrink 3 to 7% after washing, so cutting before pre-washing means your finished project may distort the first time it is laundered.
Cutting at a 45-degree angle to the grainline produces a bias cut, which gives the fabric 10 to 20% diagonal stretch. It is used for garments and trims that need to drape or curve smoothly.
A sharp rotary cutter can cleanly cut through 4 to 6 layers simultaneously. For accurate results, make sure every layer is wrinkle-free and secured before making the cut.