

 US Dollar
How to Compare Textiles for Quality and Value Easily
Posted by BLG on 2026 Jan 22nd
Posted by BLG on 2026 Jan 22nd

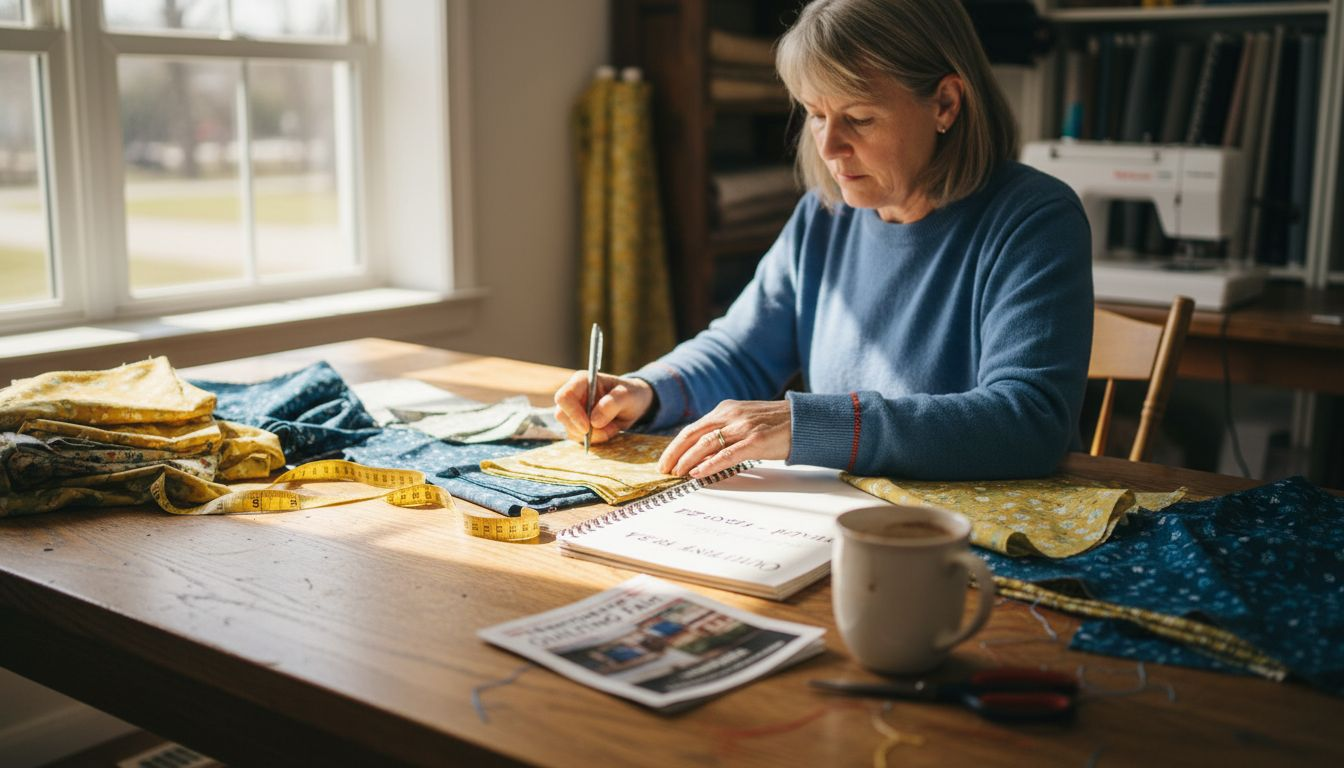
Sorting through stacks of fabric in a busy quilt shop or online retailer can leave anyone second guessing their choices. For home decor enthusiasts and small business owners across North America, finding the right material is about more than just color or print. The real difference lies in gathering fair, unbiased fabric samples that truly represent what you’ll buy, a step that eliminates surprises and ensures every project starts with quality and value in mind.
| Key Point | Explanation |
|---|---|
| 1. Gather Diverse Fabric Samples | Collect samples from various suppliers to compare quality visually and texturally, which eliminates guesswork in fabric selection. |
| 2. Inspect Texture and Hand Feel | Physically examine each fabric sample to understand its texture and quality, which influences comfort and usability in projects. |
| 3. Measure Weight and Thickness | Assess the weight and thickness of fabrics to determine durability and suitability for specific applications, ensuring your selections meet project requirements. |
| 4. Test Durability with Simple Methods | Conduct home tests like abrasion and seam strength to evaluate how the fabric will perform over time and under stress. |
| 5. Analyze Pricing for True Value | Compare fabric prices along with the quality attributes assessed to make informed decisions that maximize your investment in materials. |
Gathering textile samples is the foundation of making smart fabric choices for your quilting and craft projects. Without representative samples in hand, you’re essentially shopping blind, trying to judge quality from photos or brief in-person glances. This step ensures you have actual physical pieces to examine side by side, eliminating guesswork and helping you spot real differences in weight, texture, weave, and durability.
Start by identifying which fabrics you want to compare. If you’re planning a quilting project, grab samples of each potential option. If you’re sourcing fabrics for home decor pieces, collect options in the same color family or with similar intended uses. The key is selecting samples that fairly represent each fabric’s true characteristics. When collecting samples, effective sampling requires minimizing bias and random selection to ensure your comparisons hold weight. Don’t just grab one corner of a bolt or pick the first piece a store associate hands you. Request samples that show the fabric in its standard state. For quilting cottons, this means a piece large enough to see the print repeat and feel the hand of the fabric. For decorative fabrics, aim for samples at least 4 by 4 inches so you can truly assess drape and texture. If you’re working with a fabric supplier or designer collection, ask if they offer sample packs or if you can purchase small quantities to test before committing to larger yardage.
Organize your samples in a consistent way. Keep them in a clean folder or envelope where they won’t get wrinkled, stained, or mixed up with other projects. Label each sample clearly with the fiber content, weight (if available), price per yard, and where it came from. This labeling matters more than you might think, especially when you’re comparing similar fabrics weeks later and your memory gets fuzzy. Consider storing samples in natural light during the day so you can see how colors shift, and examine them under your actual project lighting too. If you’re comparing fabrics for a specific project, keep samples together with your pattern, thread, and other materials so everything is visible at once. This physical gathering step might seem simple, but it transforms you from a casual browser into a thoughtful buyer who actually understands what you’re getting.
Pro tip: Request samples from multiple suppliers or visit several stores to build a diverse comparison set, which prevents you from overlooking better options and gives you genuine market perspective on pricing and quality variations within your budget.
Now that you have your samples gathered, it’s time to really get to know how each fabric actually feels in your hands. Texture and fabric hand are where quality truly reveals itself, and this is something no photo or description can fully capture. By spending time touching, flexing, and feeling your samples, you’ll develop an intuition for quality that makes future fabric choices much faster and more confident.
Start by setting aside time when you can focus without distractions. Pick up one sample and run it through your fingers slowly, feeling the surface first. Notice whether it feels smooth, rough, bumpy, or slubby. Move your hand in different directions because fabric often feels different depending on which way you stroke it. Now fold it gently and unfold it again, paying attention to how it drapes and whether it wrinkles easily or bounces back. Press it between your palms and notice the weight and thickness, then hold it up to light to see if it’s tightly or loosely woven. These tactile sensory properties like stiffness, roughness, and thickness are key indicators of how the fabric will perform in your project. Repeat this process with each sample, and by the time you finish your comparison, you’ll have real physical understanding instead of guesswork.
As you inspect, think about what each feeling tells you about the fiber content and construction. A fabric that feels crisp and slightly stiff might be high quality cotton with a tight weave, while one that feels limp could indicate lower quality fibers or loose construction. If you’re evaluating quilting fabrics, feel whether the print has dimension or lies completely flat, and check if the fabric has any coating that might affect how it stitches. For decorative or upholstery fabrics, understanding textile tactile properties helps you predict how the fabric will age and perform under use. A fabric with good hand will feel pleasant and maintain its character through washing, wearing, or regular contact. Document your observations next to your samples. You might write notes like “soft but loosely woven” or “substantial weight with good recovery.” These notes become incredibly valuable when you’re deciding between options days or weeks later.
Pro tip: Bring your samples to your craft space or home during different times of day so you can feel how they perform under your actual work lighting and in your typical temperature and humidity conditions, since these factors subtly affect how fabric hand feels and behaves.
Weight and thickness are objective measurements that reveal whether you’re getting quality fabric for your money. While touching a fabric tells you how it feels, knowing its actual weight and thickness gives you concrete data for comparison. These two factors work together to determine how a fabric will perform in your projects, from quilting to home decor applications.
Start by understanding what fabric weight means for your specific project. Quilting cottons typically range from 5 to 6 ounces per linear yard, while home decor and upholstery fabrics can be significantly heavier. If your samples don’t include weight information on their labels, you can estimate by comparing them side by side. Hold each sample up to light and notice how much light passes through. A heavier fabric will block more light and feel more substantial in your hand. For a more precise approach, some fabric retailers use a scale to weigh samples, though this requires access to precision equipment. Many online fabric retailers list weight in ounces per yard or grams per square meter, so if you’ve purchased your samples, check those product pages for data. Understanding what fabric weight means helps you make informed decisions about whether each option suits your project requirements. A lightweight fabric might be perfect for a delicate quilt backing, but it could be completely inappropriate for upholstery that needs to withstand regular use and wear.

Thickness is equally important, though it’s measured differently than weight. Thickness is measured under standardized pressure, which ensures fair comparison between samples. Grab a ruler or caliper if you have one, though you don’t need precision tools for a basic assessment. Simply stack your samples and notice how much bulk they create relative to their weight. A thick, airy fabric might actually weigh less than a thin, densely woven fabric. This tells you about the fabric’s construction and structure. Dense, tightly woven fabrics tend to be more durable for quilting and craft projects, while more open weaves might provide better drape for decorative applications. Standard textile thickness measurement uses specified pressure to ensure consistent results, which is why commercial fabric testing labs get reliable data. For your purposes, comparing thickness visually and by feel alongside the weight information gives you enough context to spot quality differences. A sample that feels thick but weighs less might indicate a looser weave or bulkier fibers, while one that feels thin but weighs more suggests tight, dense construction. Document both observations for each sample. Note whether you’d describe it as lightweight, midweight, or heavyweight, and whether the thickness feels appropriate for the weight. These notes become your reference guide when you’re making final decisions.
Pro tip: When comparing samples of the same fiber type and weight, the one that feels thicker and more substantial likely has tighter weave construction, which usually translates to better durability and longevity in your finished projects.
Appearance and color consistency reveal how a fabric will look not just today, but months and years down the road. A beautiful fabric that fades quickly or pills after a few washes is a poor value, no matter how cheaply you bought it. This step focuses on what you can observe now and what those observations tell you about durability and quality.
Start by examining each sample under good natural light, ideally near a window during daylight hours. Look at the color first. Does it appear uniform across the entire sample, or do you notice variations, streaks, or uneven dye absorption? High quality fabrics have consistent color throughout, while lower quality fabrics sometimes show patchy or uneven dyeing. Check the surface carefully for pilling, which appears as small balls of fiber clumped on the fabric surface. Run your fingers gently across the sample to feel for pilling. Even a small amount suggests the fabric uses lower quality fibers or has weaker construction. Look at the print or pattern if your sample has one. Are the edges crisp and well defined, or do they look blurry and poorly registered? Are there color variations within the pattern itself? Quality prints stay consistent throughout the fabric, while budget options might have registration problems where colors don’t line up correctly. Examine the weave or knit structure closely. You’re looking for broken threads, missing stitches, or areas where the weave looks loose or irregular. Quality fabrics have tight, consistent construction throughout. Standardized methods to assess textile appearance after washing and drying include evaluating color changes and pilling, which helps identify fabrics that will hold up to real world use.
Now think about how these observations connect to longevity and value. A fabric with excellent color consistency and zero pilling will maintain its appearance through many wash cycles and regular use. One that shows pilling or uneven color now will only get worse. Pay attention to any finishing treatments you notice. Some fabrics feel slightly stiff or slick because they have protective coatings that will wear away with use, while others feel natural and soft because the quality comes from the fibers and construction themselves. Document what you see for each sample. Note observations like “excellent color consistency,” “slight pilling on surface,” “crisp print registration,” or “loose weave in corners.” These details matter when you’re making your final comparison and deciding which fabrics offer the best value for your investment. Remember that appearance quality often correlates directly with how long your finished project will look good and perform well.
Pro tip: If possible, examine your samples under both natural daylight and the artificial lighting where you’ll be using the finished project, since colors can shift noticeably under different light sources and what looks perfect in store lighting might disappoint you at home.
Durability testing separates fabrics that will last through countless projects from those that will disappoint you after a few uses. While previous steps revealed how fabric looks and feels now, this step shows you how it will hold up over time. Testing durability doesn’t require expensive lab equipment. You can perform practical, meaningful tests right at home with simple materials.
Start with the abrasion test, which simulates wear and friction. Take one sample and rub it firmly against itself or a rough surface like concrete for about 30 seconds, using moderate pressure. Look closely at the area you rubbed. Did the fibers pill, fray, or break? Quality fabrics show minimal damage, while lower quality options will show visible pilling, loose threads, or even small holes. Next, test seam strength if your sample has finished edges or seams. Grab two opposite corners and pull firmly but not violently. The fabric should stretch slightly without seams separating or threads breaking. If seams pop easily or threads break immediately, the fabric likely won’t hold up to washing and wearing. For quilting fabrics, gently crease a corner and unfold it repeatedly. Quality quilting cotton will recover and eventually crease will fade, while lower quality fabric might show permanent wrinkling or fiber breakdown. Test colorfastness by dampening a corner with water and rubbing it against white fabric or paper. If color transfers significantly, the dye isn’t well set and the fabric will bleed during washing. Understanding abrasion resistance and seam strength helps predict how your fabrics will perform in real world conditions over months and years of use.
Consider UV light exposure if your samples will be used in projects displayed near windows or outdoors. Leave one sample in direct sunlight for a few hours while keeping another in a dark drawer. Compare them afterward. If the exposed sample shows noticeable color fading, the fabric won’t maintain its appearance long term in bright conditions. Document your durability test results for each sample. Note observations like “minimal pilling after rub test,” “seams held strong under pulling,” “color bled slightly when wet,” or “shows permanent creasing.” These practical tests combined with your previous observations about appearance, weight, and hand give you comprehensive understanding of each fabric’s likely performance and longevity. A cheap fabric that fails multiple durability tests is actually expensive over time because you’ll need to replace projects more frequently. A higher priced fabric that passes all durability tests offers better long term value.
Pro tip: Test the seams and edges of your samples before performing abrasion tests, since once fibers break down you won’t be able to accurately assess original seam strength and construction quality.
Below are common quality issues and what they reveal about fabric construction:
| Issue Detected | Likely Cause | Long-Term Impact |
|---|---|---|
| Color fading in sunlight | Poor dye process | Quick loss of vibrancy |
| Pilling after abrasion | Weak fiber or loose weave | Fabric degrades with use |
| Seam breakage under tension | Flawed stitching or low fiber strength | Short usable lifespan |
| Variation in color | Inconsistent dye batch | Uneven final appearance |
Now that you have comprehensive data about each fabric’s quality, durability, and characteristics, it’s time to analyze pricing in context. The cheapest option isn’t always the best value, and the most expensive option isn’t automatically superior. True value emerges when you balance price against all the quality factors you’ve already evaluated.
Start by listing the price per yard for each sample alongside your quality observations. If prices aren’t clearly marked, check the retailer’s website or ask directly. Write down the price per linear yard, since comparing yardage costs gives you a fair basis for comparison even if you purchased different quantities. Now look at your notes from previous steps. The fabric that cost the least but failed multiple durability tests, showed pilling, and has loose construction is actually expensive because you’ll replace projects more often. Conversely, a fabric that costs more but passed all your durability tests, has excellent color consistency, tight construction, and high quality hand is genuinely better value because it will outlast cheaper options by years. Consider fiber content as part of this analysis. A cotton quilting fabric at eight dollars per yard might use lower quality cotton with looser weave, while a ten dollar option uses premium cotton with tight construction. Understanding cost structures and competitive factors in textile pricing helps you recognize that production efficiency and material quality directly influence what you pay and what you receive.
Create a simple comparison chart to visualize this. List each fabric sample with its price per yard, then note pass or fail for each test you performed. Include observations about hand, appearance, durability, and any other factors that matter for your specific project. Look at the complete picture instead of focusing on any single factor. A midpriced fabric that excels in every quality category offers better value than the cheapest option that fails multiple tests. Consider the intended use too. For a small quilting project that won’t get heavy use, spending more on premium fabric might be unnecessary if a midrange option performs well. For upholstery that will see daily contact and wear, investing in the highest quality option available often makes sense because it will last years longer. Calculate cost per project if helpful. A slightly more expensive fabric that lasts 50 percent longer effectively reduces your cost per finished project. Project longevity matters whether you’re making gifts, selling items, or creating pieces for your own home. Your time investment in creating a project is significant, so choosing fabrics that will still look beautiful years later makes financial and emotional sense.
Pro tip: Calculate the cost per use for fabrics in home decor or wearable projects by dividing the fabric cost by how many years or seasons you expect the project to remain in use, which reveals true value more clearly than price per yard alone.
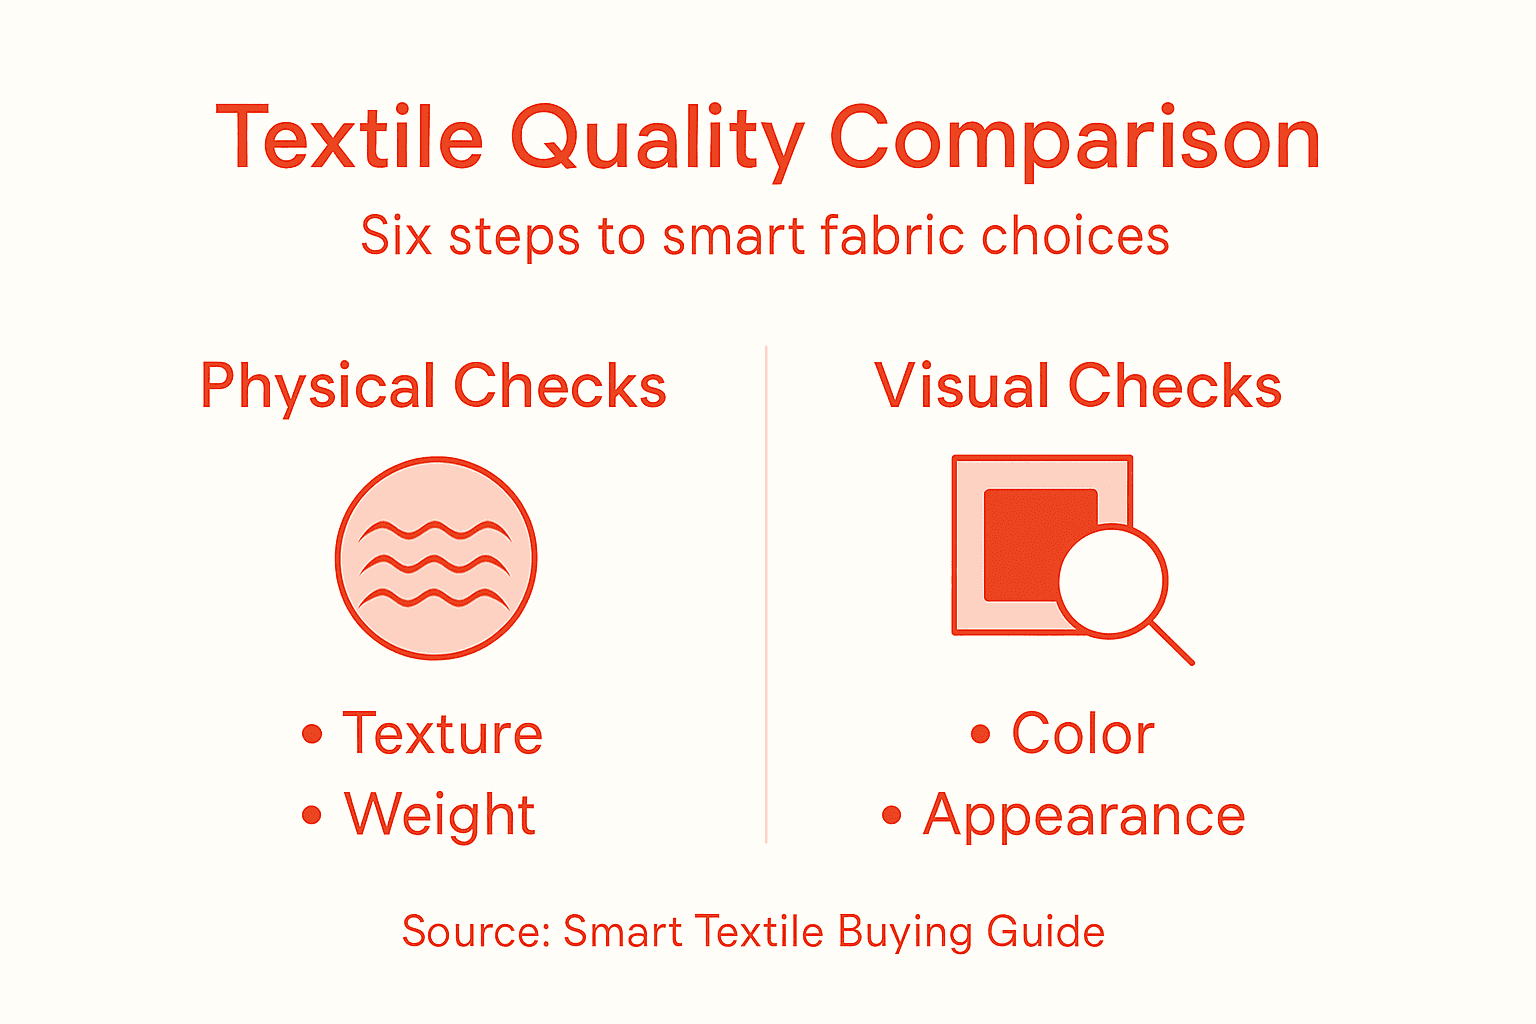
Here is a summary of how each inspection step supports smart textile selection:
| Step | Main Focus | What You Learn | Why It Matters |
|---|---|---|---|
| Gather Samples | Physical variety | True differences between options | Avoids biased or incomplete choices |
| Inspect Texture | Surface and hand feel | Fiber quality and suitability | Ensures comfort and workability |
| Measure Weight | Density and thickness | Durability and appropriate use | Prevents mismatch for project type |
| Evaluate Appearance | Color and finish | Visual consistency and wear signs | Predicts longevity and value |
| Test Durability | Strength and resilience | Real-world performance | Avoids premature fabric failure |
| Compare Pricing | Cost versus quality | True value per project | Maximizes investment return |
Choosing the right fabric can feel overwhelming when you need to compare texture, weight, durability, and price all at once. This article highlights the challenge of making smart textile decisions without guesswork and shows you how to evaluate samples effectively before investing in your project. If you want to skip the confusion and shop with confidence, finding reliable fabric sources that provide detailed product info is key. At Fabric-Fabric.com, we make this straightforward by offering a wide selection of premium textiles complete with clear descriptions and pricing to help you measure quality and value side by side.

Ready to put your newfound knowledge into action Choose from our diverse range of quilting, apparel, and home decor fabrics designed to meet the standards you learned about like consistent color, appropriate weight, and durability. With easy navigation and helpful product details you can quickly compare options that fit your project needs and budget. Visit Fabric-Fabric.com now and start your next project with fabrics you can trust. Don’t miss out on seasonal sales and free shipping offers that reward smart buying decisions.
Gather textile samples by selecting options that closely represent your project needs, such as colors, textures, and intended uses. Request samples that are large enough to analyze their quality accurately and keep them organized with clear labels for easy identification.
When inspecting fabric texture and hand, focus on how the fabric feels when touched and how it drapes. Spend time exploring the surface properties, such as stiffness or softness, and document your observations to guide your choices and ensure comfort.
To measure weight, hold fabric samples to light and evaluate their density, or use a scale if available. For thickness, stack samples and visually compare bulk; noting heavier or thicker fabrics typically indicate better durability suited for your projects can help make informed decisions.
Examine each fabric under good lighting for uniform color and surface quality, searching for signs like pilling or uneven dye absorption. Note any variations and their implications for long-term appearance, as consistent fabrics usually hold their look better over time.
Perform simple home tests such as rubbing samples against a rough surface or pulling seams to assess abrasion resistance and seam strength. Document the outcomes to determine which fabrics will endure wear and maintain quality performance over time.
Evaluate the cost per yard in relation to the quality indicators you’ve documented. Compare fabrics that passed durability tests against their pricing to ensure you are making a value-driven decision, focusing on how longevity decreases overall costs per project.