

 Canadian Dollars
How to Check Fabric Authenticity: A Practical Guide
Posted by BLG on 2026 Jun 23rd
Posted by BLG on 2026 Jun 23rd

TL;DR:
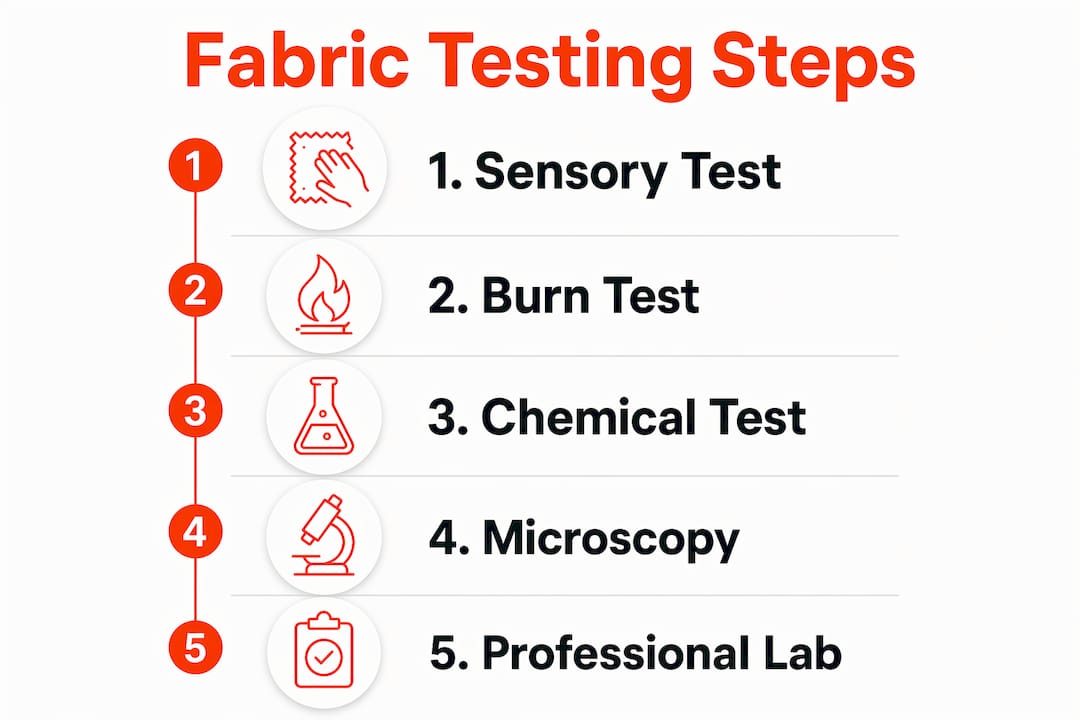
- Fabric authenticity testing involves sensory, chemical, and microscopic methods to verify a textile’s true fiber content. Small businesses should use simple tools like burn tests and microscopes for initial checks and consider professional lab tests for high-stakes verification. Combining multiple methods ensures accurate identification of fiber types and blends, protecting quality and reputation.
Fabric authenticity testing is the process of confirming a textile’s true fiber content through sensory, chemical, and microscopic methods. Artisans, crafters, and small business owners who skip this step risk paying for silk and receiving polyester, or buying “100% cotton” that performs like a blend. Knowing how to check fabric authenticity protects your investment, your reputation, and the quality of your finished work. The core methods range from a simple scrunch test you can do in seconds to lab-grade FTIR analysis used for legal certification. This guide walks you through every level, from your kitchen table to a professional lab.
Effective fabric validation techniques start with the right tools, most of which cost under $30. You need tweezers to pull individual fibers, a lighter or matches for burn testing, a magnifying glass or a portable microscope for visual inspection, and a small cup of water for absorption tests. Optional additions include 5% bleach solution and 20% hydrochloric acid for chemical solubility tests, though these require careful handling.
Before you test anything, read the fabric label. Fabric labels often reflect blend dominance for marketing purposes rather than precise fiber content. A label reading “cotton blend” could mean 60% cotton or 95% cotton. Certifications like OEKO-TEX® and GOTS provide a stronger baseline, but they still benefit from physical verification.
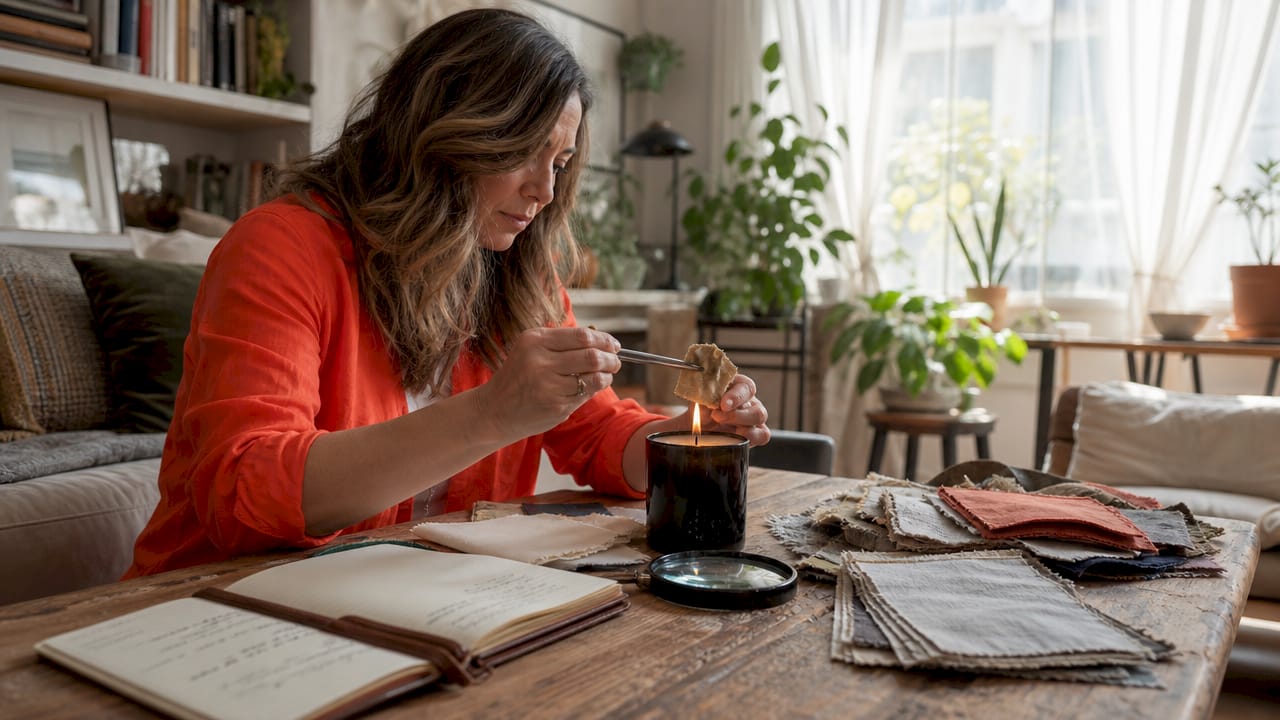
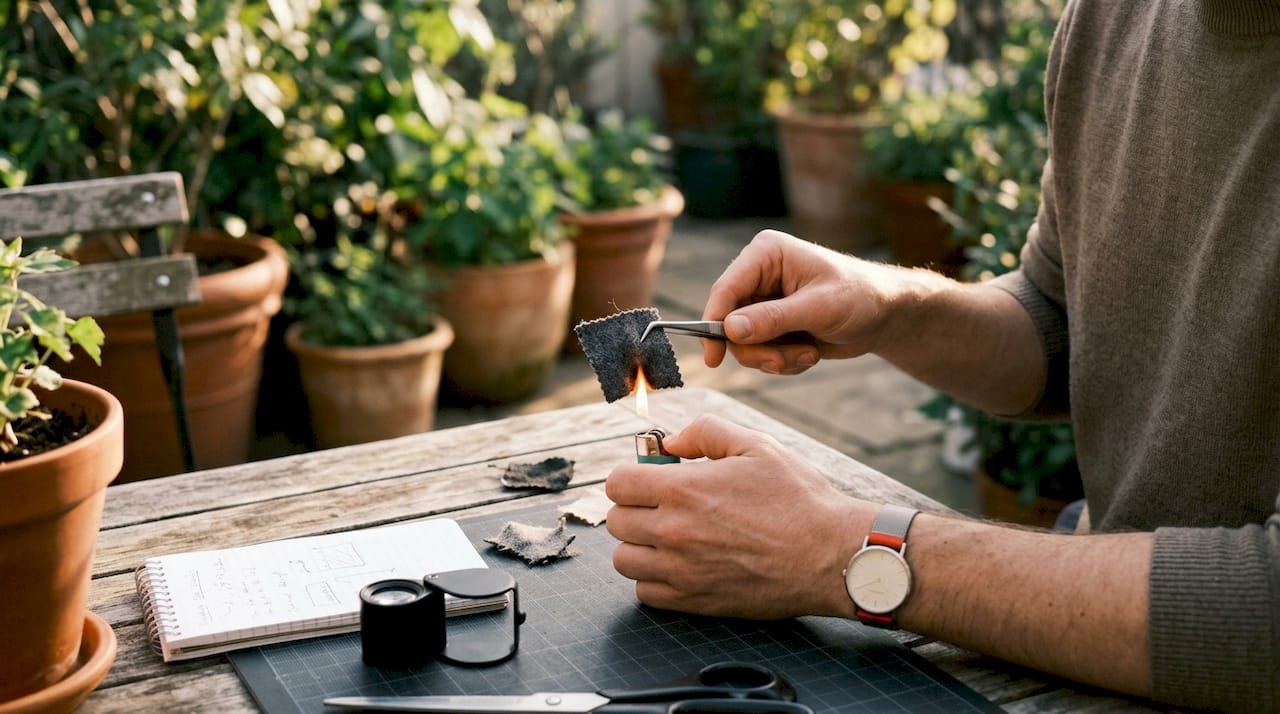
Safety matters most during burn testing. Work outdoors or near an open window. Keep a small bowl of water nearby to extinguish samples. Never burn more than a few threads at a time.
Pro Tip: Always pull your test sample from an interior seam allowance or hem. Testing a hidden area preserves the fabric’s appearance if the test leaves a mark or small burn.
Sensory evaluation is the fastest way to identify real fabric before committing to any destructive test. Natural fibers absorb water rapidly and wrinkle deeply, while synthetics repel water and spring back quickly. Scrunch a corner of the fabric tightly in your fist for five seconds, then release it. Deep, lasting creases point to cotton or linen. A fabric that bounces back almost perfectly is likely polyester or nylon.
Silk has a distinctive warmth. It adapts to your body temperature within seconds of contact. Synthetics that mimic silk feel either clammy or icy and do not warm up the same way. Luster is another clue: real silk has a soft, shifting sheen, while polyester satin has a flat, uniform gloss.
The burn test gives you the clearest confirmation. Follow these steps carefully:
| Fiber | Flame behavior | Odor | Residue |
|---|---|---|---|
| Cotton | Burns fast, orange flame | Burning paper | Soft gray ash |
| Linen | Burns fast, similar to cotton | Burning paper | Soft gray ash |
| Wool | Burns slowly, self-extinguishes | Burning hair | Black crispy bead |
| Silk | Burns slowly, self-extinguishes | Burning hair | Black crispy bead |
| Polyester | Melts and burns | Chemical, sweet | Hard black bead |
| Nylon | Melts, shrinks from flame | Celery-like | Hard tan bead |
| Acrylic | Burns fast, sputters | Acrid, chemical | Hard irregular bead |
Burn tests are qualitative, not quantitative. They tell you which fiber types are probably present, not what percentage of each. A cotton-polyester blend, for example, may burn with characteristics of both fibers and give you an ambiguous result.
Pro Tip: Test three separate samples from different parts of the fabric. Blends can behave inconsistently depending on which fiber dominates in a given area. Document each result with a photo before discarding the sample.
Microscopy moves fabric authenticity verification from probable to near-certain. Portable microscopes at 60–100x magnification let artisans identify fibers by their physical structure. Wool fibers show overlapping scales like roof shingles. Linen fibers have visible nodes or joints along their length. Silk appears as smooth, triangular filaments. Polyester and nylon look like uniform, featureless rods.
Preparing a microscopy sample takes under two minutes. Follow these steps:
Chemical solubility tests go one step further for ambiguous results. Applying 5% bleach or 20% HCl can distinguish silk from synthetic alternatives, but these reagents can destroy the sample. Always complete non-destructive visual and sensory checks first.
| Fiber | 5% bleach | 20% HCl |
|---|---|---|
| Wool | Dissolves | Resistant |
| Silk | Dissolves slowly | Dissolves |
| Cotton | Resistant | Dissolves slowly |
| Polyester | Resistant | Resistant |
| Nylon | Resistant | Dissolves |
Handle all chemical reagents with gloves and eye protection. Work in a ventilated space and dispose of solutions according to local guidelines. For a deeper look at evaluating fabric samples before committing to chemical tests, Fabric-fabric’s guide covers tactile and sensory methods in detail.
Professional lab testing becomes necessary when the stakes are high enough that a burn test or microscope is not sufficient. Textile authenticity verification uses a tiered approach: Tier 1 covers visual, sensory, and burn tests; Tier 2 covers chemical solubility and microscopy; Tier 3 covers high-precision laboratory analysis.
Tier 3 methods include:
FTIR and DSC provide legally defensible results for regulatory compliance and high-value purchases. If you are sourcing fabric for a product line, labeling garments for retail sale, or purchasing a significant quantity of a luxury fiber, Tier 3 testing is worth the cost. Always request supplier documentation, mill certificates, and any available OEKO-TEX® or GOTS certifications alongside lab data. Understanding fabric blends and label documentation before you order reduces the need for expensive post-purchase testing.
The most frequent error is over-relying on a single test. A burn test alone cannot confirm a 70/30 wool-acrylic blend. A label alone cannot confirm that the stated fiber content is accurate. Cross-validating two or more methods gives you confidence that one test cannot.
Watch for these specific pitfalls:
When results are ambiguous after Tier 1 and Tier 2 testing, escalate to a professional lab rather than guessing. For identifying fabric quality beyond fiber content, Fabric-fabric’s guide covers construction, weight, and finish evaluation.
Pro Tip: Keep a simple testing log with the fabric name, supplier, test date, and results for each method used. Over time, this record helps you spot patterns in supplier quality and builds a reference library for future purchases.
Reliable fabric authentication requires combining at least two methods from different tiers, since no single test confirms fiber identity and blend percentage simultaneously.
| Point | Details |
|---|---|
| Start with sensory tests | The scrunch and water absorption tests take seconds and reveal natural vs. synthetic fibers immediately. |
| Use burn tests carefully | Burn tests identify probable fiber types but cannot quantify blend ratios; document every result. |
| Add microscopy for accuracy | A portable microscope at 60–100x magnification confirms fiber structure beyond what sensory tests can show. |
| Know when to go to a lab | FTIR, DSC, and gravimetric analysis are necessary for legal labeling, blend quantification, and luxury fiber verification. |
| Read labels critically | Certifications like OEKO-TEX® and GOTS help, but physical testing remains the only way to confirm label accuracy. |
The biggest mistake I see artisans and small business owners make is treating fabric testing as a one-time task. You test a sample swatch once, it passes, and you assume every bolt from that supplier is identical. Suppliers change mills. Mills change raw material sources. The fabric you tested in january may not be the same product you receive in august.
My practical advice: build a simple testing ritual into every new order, not just new suppliers. A two-minute scrunch test and a quick look under a loupe costs nothing and catches problems before you cut into a full bolt. If you are sourcing velvet, satin, or lace for a product line, the burn test is non-negotiable. These are the fabric categories where synthetic substitution is most common and most costly to your reputation.
The emerging area worth watching is portable FTIR devices. Prices have dropped significantly in recent years, and some textile forensics firms now offer mail-in testing at accessible price points. For most artisans, though, the combination of sensory evaluation, a burn test, and a portable microscope covers the vast majority of authenticity questions you will encounter. Invest in the tools, build the habit, and trust the process.
— kev
Knowing how to verify fabric quality is only half the equation. The other half is sourcing from a supplier whose products hold up to scrutiny.

Fabric-fabric carries a curated selection of textiles across categories including satin, velvet, lace, seersucker, and sequins, each with detailed fiber descriptions to support your verification process. The backdrop fabrics collection is a strong starting point for artisans and event professionals who need consistent, authenticated textile quality. For home projects, the home decor fabric range covers upholstery, drapery, and accent materials with clear product specifications. Fabric-fabric also publishes practical guides on fabric evaluation to help you make informed choices before you buy.
The scrunch test is the fastest starting point. Crush a corner of the fabric in your fist, release it, and check whether deep creases remain (natural fibers) or the fabric springs back (synthetics).
No. Burn tests are qualitative and indicate probable fiber types only. Gravimetric analysis per ASTM D629 or ISO 1833 is required for precise blend quantification.
Real silk warms to your body temperature within seconds and has a soft, shifting sheen. Polyester satin feels icy or clammy and has a flat, uniform gloss. A burn test confirms it: silk self-extinguishes and leaves a black crispy bead, while polyester melts and leaves a hard bead with a chemical odor.
Professional testing is necessary when you need legally defensible results, such as for retail garment labeling, large-volume sourcing decisions, or verification of luxury fibers like cashmere. FTIR and DSC are the standard methods at this level.
Certifications provide a reliable baseline but do not replace physical testing. Label literacy is essential because fiber blends are common and labels can reflect marketing priorities rather than exact content. Always verify with at least one physical test.