

 US Dollar

How to Adjust Fabric Tension for Perfect Stitches
Posted by BLG on 2026 Jul 19th
Posted by BLG on 2026 Jul 19th


TL;DR:
- Proper fabric tension adjustment requires small, tested changes based on fabric and thread type to achieve balanced, professional stitches. Most issues stem from incorrect threading, poor-quality thread, or lint in the machine rather than dial settings alone. Consistent testing and proper setup save time and improve stitch quality across projects.
Adjusting fabric tension is the process of balancing upper and bobbin thread tensions to create smooth, even stitches suited to your fabric and project. Get it wrong and you end up with puckered seams, looping thread, or broken stitches that ruin hours of work. Get it right and every seam lies flat, holds strong, and looks professional. Most home sewing machines ship with the tension dial set between 4 and 5 for medium-weight cotton, and that single number is your starting point for every adjustment you will ever make.
The right setup prevents most tension problems before they start. Gather these items before touching the tension dial:
Rethreading with the presser foot raised is non-negotiable. When the foot is up, the tension discs open and the thread seats correctly between them. Thread with the foot down and the thread bypasses tension control entirely, causing stitch flaws that no dial adjustment will fix.
Pro Tip: Replace your needle every 8–10 hours of sewing time. A dull needle mimics tension problems with puckering and skipped stitches, sending you chasing a dial issue that does not exist.
| Tool or step | Why it matters |
|---|---|
| High-quality thread | Reduces lint and prevents uneven thread delivery |
| Correct needle size | Prevents friction in the needle eye that fakes high tension |
| Scrap fabric for testing | Gives accurate stitch feedback before sewing your project |
| Presser foot raised when threading | Seats thread correctly in tension discs |
| Clean bobbin area | Removes lint that disrupts thread flow and stitch balance |
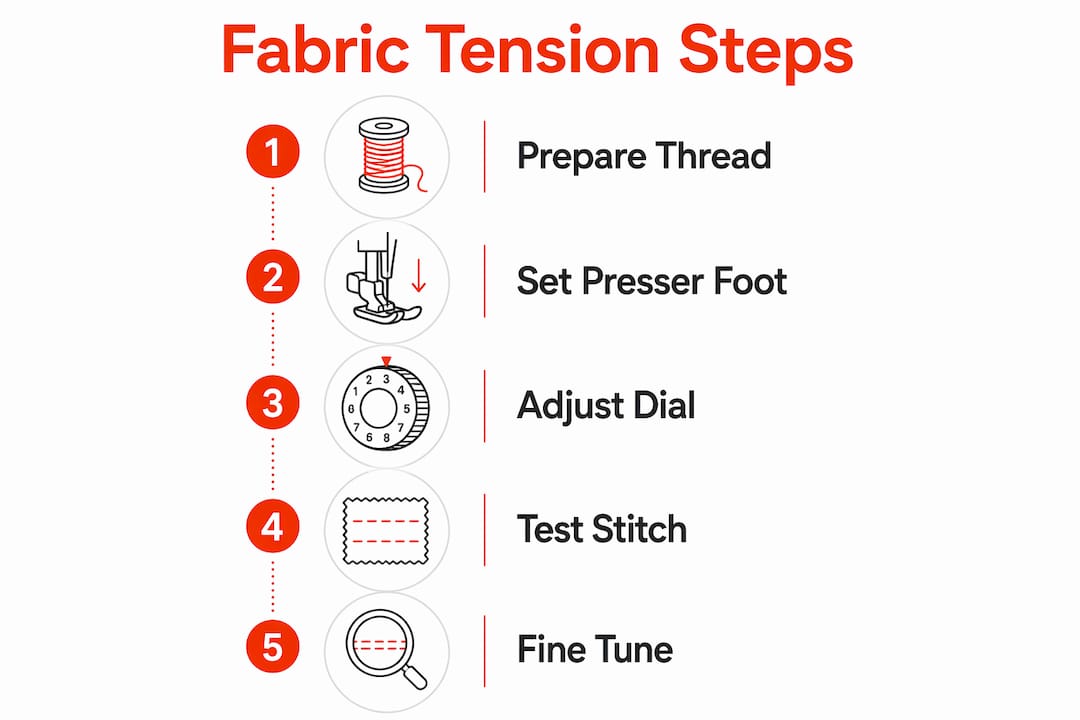
The upper tension dial controls how tightly the machine grips the top thread as it feeds through. Adjusting it is a methodical process, not a guessing game.
Patience is the real skill here. Most crafters make the mistake of turning the dial two or three numbers at once, then overcorrecting in the other direction. Small moves and fresh test lines give you control.
Pro Tip: If you cannot find the right setting, turn the dial all the way down to 0, then increase slowly. Starting from zero removes any confusion about where you are on the dial and lets you feel the tension build from nothing.

Bobbin tension is factory set and rarely needs changing. Bobbin tension adjustment should be a last resort, attempted only after you have confirmed the needle size, thread quality, and upper threading are all correct.
The bobbin case holds a small screw that controls how tightly the case grips the bobbin thread. To test whether bobbin tension is the actual problem, hold the bobbin case by its thread and let it dangle. A gentle shake should cause the case to drop slightly. If it drops freely, tension is too loose. If it does not move at all, tension is too tight.
Before touching the screw, photograph or mark its original position. Even a quarter turn changes stitch tension significantly. If you lose track of the original setting, you may need a technician to recalibrate the machine.
Specialty threads like metallic or heavy topstitching thread sometimes require a slightly looser bobbin tension because they are thicker and create more friction. Heavy canvas or upholstery fabric can also demand a small bobbin adjustment when the upper dial alone cannot achieve balance. For most standard sewing projects, though, the upper dial handles everything.
Pro Tip: Keep a dedicated bobbin case for specialty threads. Adjust that case freely and leave your standard case untouched. This protects your everyday settings.
Stitch balance depends on fabric weight and needle geometry, which means you need to retest tension every time you switch fabrics. A setting that works perfectly on quilting cotton will produce puckered seams on silk and broken stitches on denim.
Recommended starting tension settings by fabric type:
| Fabric type | Starting tension setting | Needle size |
|---|---|---|
| Cotton (medium weight) | 4–5 | 80/12 universal |
| Denim | 5–6 | 100/16 denim |
| Silk | 2.5–3.5 | 70/10 microtex |
| Stretch fabrics | 3–4 | 75/11 ballpoint |
These are starting points, not fixed rules. Your specific thread brand, machine model, and stitch type will shift the ideal number slightly. Always sew a test swatch when you change any variable.
Thread thickness matters as much as fabric weight. A thicker thread needs a slightly looser upper tension because it takes up more space in the tension discs. A very fine thread needs more tension to prevent looping. Matching needle size to thread weight reduces friction inside the needle eye, which prevents false tension readings that send you adjusting the dial for a problem that is actually mechanical.
Understanding fabric weight differences before you cut your project saves significant troubleshooting time. Heavier fabrics need higher tension and larger needles. Lighter fabrics need lower tension and finer needles. The relationship is consistent once you internalize it.
Regular cleaning also keeps tension consistent. Lint in the bobbin area changes how the bobbin thread feeds, creating tension that varies stitch by stitch. A quick brush-out after every project takes 60 seconds and prevents hours of troubleshooting.
95% of tension issues resolve with cleaning and rethreading, not dial adjustments. That statistic matters because it means most crafters are solving the wrong problem when they reach for the tension dial.
Before adjusting the bobbin tension screw, work through this checklist: rethread with the foot up, replace the needle, clean the bobbin area, and sew a fresh test swatch. If the problem persists after all four steps, then consider the upper dial. Only move to the bobbin screw if upper dial adjustments at both extremes still cannot balance the stitch.
Pro Tip: Keep a sewing log with a small tape of test stitches for each project. When a tension problem appears, compare the current swatch to past successful ones. The difference often reveals the cause immediately.
Good fabric maintenance habits extend to your machine as well. A well-maintained machine holds its calibration longer and gives you more consistent results across different fabric types.
Correct fabric tension adjustment starts with proper threading and machine maintenance, not the tension dial, and requires small, tested increments matched to your specific fabric and thread combination.
| Point | Details |
|---|---|
| Start at dial 4–5 | Factory default for cotton; use as your baseline before any adjustment. |
| Diagnose by stitch appearance | Loops on bottom mean increase tension; bobbin thread on top means decrease it. |
| Rethread before adjusting | Raise the presser foot and rethread completely before touching the dial. |
| Match needle to fabric and thread | Wrong needle size creates friction that mimics tension problems. |
| Treat bobbin tension as a last resort | Adjust the bobbin screw only after ruling out threading, needle, and lint issues. |
Tension adjustment taught me patience the hard way. My first year of serious sewing, I adjusted the bobbin screw on three different machines trying to fix problems that turned out to be a bad spool of thread. I lost the original settings on one machine and had to pay for a professional recalibration. That experience cost me more than the thread ever would have.
The habit that changed everything was keeping a physical sewing log. A small notebook with a taped test swatch, the dial setting, thread brand, needle size, and fabric type for every project. When something goes wrong now, I flip back two pages and compare. The cause is almost always obvious: I switched thread brands, forgot to change the needle, or skipped the lint brush.
Silk is the fabric that humbles most crafters on tension. The silk tension range of 2.5–3.5 is so narrow that a single number difference produces visible puckering. I always sew at least six inches of test stitches on silk before touching the actual fabric. That extra five minutes saves the project every time.
Tension adjustment is a learnable skill, not a mechanical mystery. The crafters who struggle with it are usually the ones skipping the test swatch or making large dial jumps. Slow down, test every change, and trust the process. The dial will start to feel intuitive faster than you expect.
— kev
Getting tension right is only half the equation. The fabric you choose determines how much adjustment you need and how forgiving the process is.

Fabric-fabric carries a wide selection of backdrop fabrics suited to projects where stitch quality is visible and tension must be exact. For home decor projects, the home decor fabric collection includes medium to heavyweight textiles that respond well to the tension settings covered in this guide. Each fabric listing includes weight and usage notes, so you can match your needle and dial setting before your order even arrives. Quality fabric from a reliable source makes every tension adjustment more predictable and every finished project more satisfying.
Most home sewing machines are calibrated with the tension dial set between 4 and 5 for medium-weight cotton. Start at this setting and adjust in increments of 0.5 to 1.0 based on test stitch results.
Loops on the bottom of the fabric mean the upper thread tension is too loose. Increase the tension dial number by 0.5 to 1.0 and sew a fresh test swatch to check the result.
Replace your needle every 8–10 hours of sewing time. A dull needle causes puckering and skipped stitches that mimic tension problems, leading to unnecessary dial adjustments.
Bobbin tension is factory set and rarely needs adjustment. Only touch the bobbin screw after confirming that rethreading, needle replacement, and lint removal have not resolved the issue, and always photograph the original screw position first.
Yes. Recommended starting settings vary by fabric: cotton uses 4–5, denim 5–6, silk 2.5–3.5, and stretch fabrics 3–4. Always sew a test swatch when switching fabric types.